

Learning how to contour for beginners is easiest when you apply a cool or neutral-toned shade to the natural shadows of your face, then blend until there are no obvious edges. Start with a small amount beneath the cheekbones, along the hairline, under the jaw, and beside the nose—adding more only where you want extra definition. The seven-step method below creates a soft, believable result rather than harsh stripes.
Quick Takeaways
- Choose the right tone: Contour should look like a natural shadow, so pick a cool or neutral shade about one to three shades deeper than your skin.
- Use less than you think: A small amount is much easier to blend and build than a heavy first layer.
- Place strategically: Focus under the cheekbones, around the forehead, beneath the jaw, and optionally along the nose.
- Blend upward: Upward blending keeps the face looking lifted instead of pulling features down.
- Check natural light: Window light reveals unblended edges and undertone mismatches better than most bathroom lighting.
What Does Contouring Do to Your Face?

Contouring uses shadow to create the appearance of depth and definition. It can make cheekbones look more sculpted, visually shorten or narrow certain areas, and add dimension that foundation sometimes removes.
Contour and bronzer aren't the same thing. Contour mimics shadow, so it generally has a neutral, cool, or muted undertone. Bronzer mimics warmth from the sun and usually looks more golden, peachy, or reddish. You can use both, but place contour slightly lower and bronzer higher where sunlight naturally hits.
Honestly, the goal isn't to redraw your whole face. I've found that beginners get the most natural result by choosing just two areas to define—usually the cheeks and forehead—before experimenting with the nose or jawline.
Contour also doesn't need to be dramatic. For everyday makeup, you should be able to see added shape without immediately seeing where the product begins and ends.
Which Contour Products Are Best for Beginners?
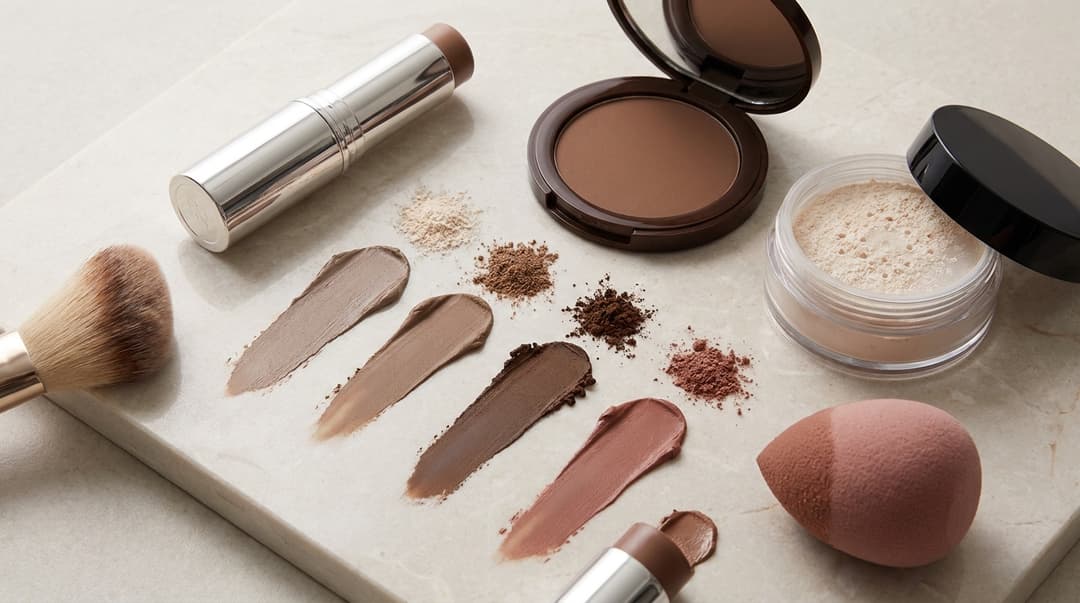
When you're learning how to contour for beginners, choose a formula that suits your skin type and the finish you want. These are the three most useful product types:
- Cream contour stick: Easy to place precisely and ideal for normal or dry skin. Look for a blendable formula with emollients such as squalane or jojoba oil, but avoid drawing thick lines directly from the stick.
- Pressed powder contour: Offers controlled, gradual color and often works well on oily or combination skin. Apply it with a soft angled brush rather than a dense brush.
- Translucent setting powder: Lightly sets cream contour and reduces movement without adding another obvious layer of color.
For shade selection, swatch the contour along the side of your face rather than on your hand. Pick a shade one to three levels deeper than your skin tone that doesn't turn orange, red, or noticeably gray. Deeper complexions may need rich espresso, neutral brown, or softly red-brown pigments rather than an ashy taupe.
From an ingredient perspective, mica and iron oxides are common pigments that provide slip and color. Silicones can help a cream formula blend smoothly, while finely milled starches may absorb oil in powders. If your skin is reactive, consider a fragrance-free option and check for ingredients you already know cause irritation. Claims such as clean or noncomedogenic aren't tightly standardized, so the full ingredient list is more useful than the front label.
Look, you don't need a huge contour palette. One versatile shade creates less waste, costs less, and is easier to master. Refillable packaging or a recyclable single-material compact is a nice bonus, but using a product completely is often the most practical low-waste choice.
How to Contour for Beginners Step by Step
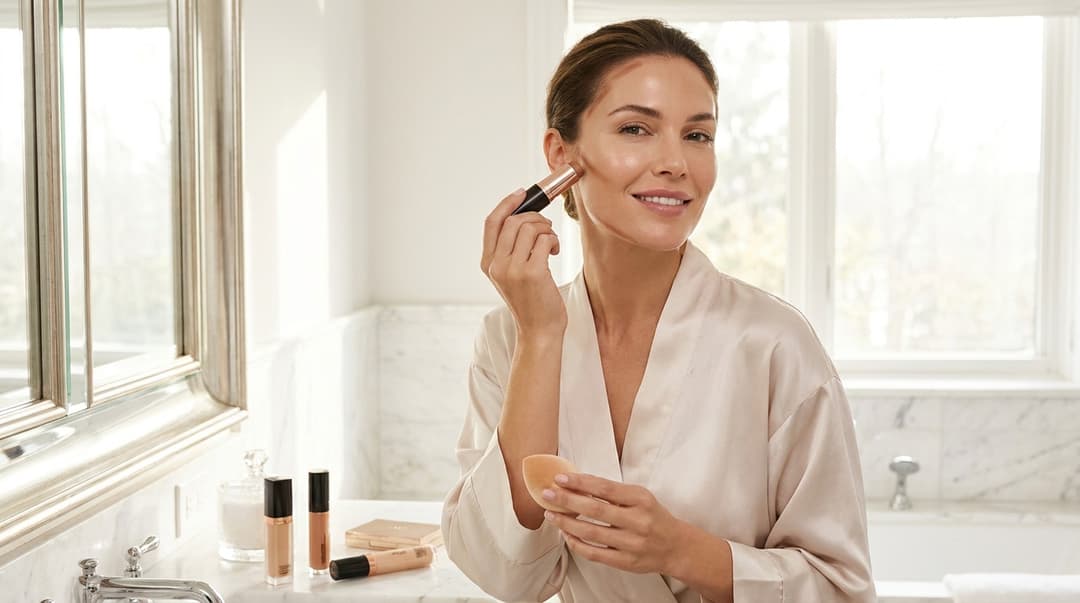
Before starting, apply your usual base in thin layers. Contour blends more evenly over skin that feels hydrated but not slippery.
Find your natural shadows. Stand near a window and gently suck in your cheeks or feel for the hollow beneath each cheekbone. Also notice the shadows around your temples, jaw, and nose.
Apply a small amount beneath the cheekbones. Start near the top of the ear and stop around the outer edge of the eye. Don't carry the line toward the mouth, which can make the face look hollow or dragged down.
Add contour around the forehead. Place a little along the temples and hairline. Concentrate product near the sides if you want subtle narrowing, or across the upper hairline if you want the forehead to appear slightly shorter.
Define the jaw carefully. Tap contour directly underneath the jaw rather than on top of it. Blend down into the neck so the color doesn't create a floating line around your face.
Contour the nose only if you want to. Use the leftover product on a small brush to create two faint, parallel shadows. Keep them soft and close together, then add a tiny amount beneath the nose if you want it to look visually shorter.
Blend the edges upward. Use a damp makeup sponge for cream or a soft angled brush for powder. Tap instead of rubbing, and blend cheek contour toward the temples—not down toward the jaw.
Set and inspect your work. Press a light veil of translucent setting powder over cream contour where needed. Step back from the mirror and check both sides in natural light before adding more.
So, the biggest practical tip is to keep your blending tool clean. A brush loaded with old pigment can deposit uneven patches, while an overly wet sponge may lift foundation. Your sponge should feel damp and springy, not dripping.
Where Should You Contour for Your Face Shape?
Face-shape maps are guidelines, not rules. The most flattering placement supports the effect you want, and symmetry matters less than smooth blending.
- Round face: Place contour under the cheekbones and around the outer forehead, blending upward to create gentle length and definition.
- Square face: Soften the outer corners of the forehead and jaw while keeping the cheek contour diffused.
- Oval face: Use light contour beneath the cheekbones and around the hairline without extending it too far inward.
- Heart-shaped face: Focus on the temples and outer forehead, then use a small amount beneath the chin if desired.
- Long face: Apply contour across the upper hairline and lightly beneath the chin. Keep cheek contour more horizontal than diagonal.
A helpful approach to how to contour for beginners is to ignore the label for your face shape at first. Instead, decide whether you want an area to look more defined, shorter, narrower, or softer, then place the shadow accordingly.
What Contouring Mistakes Should Beginners Avoid?
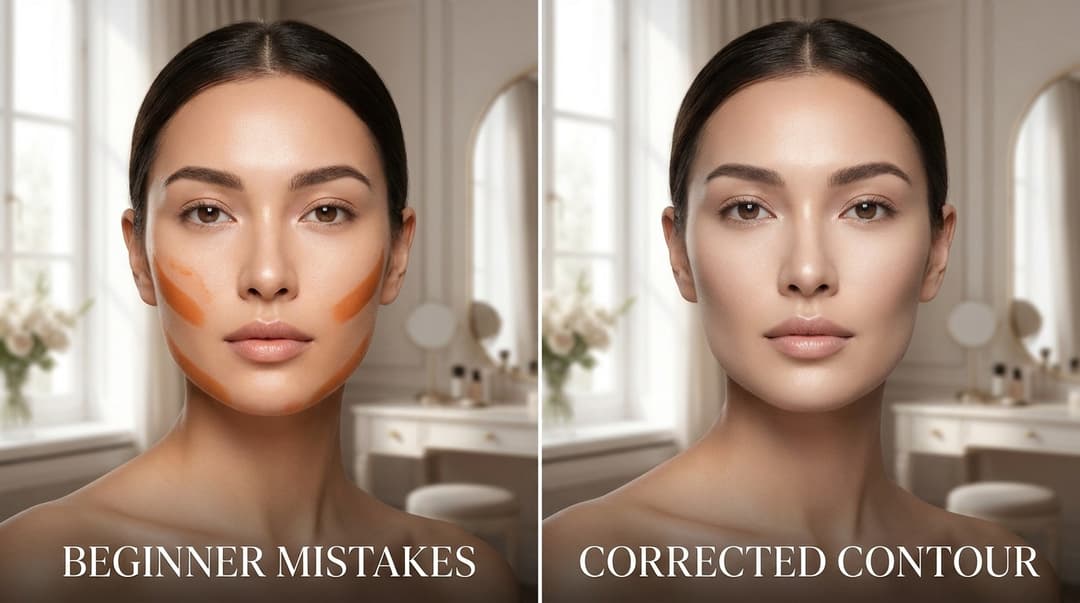
Even good formulas can look patchy when the shade, placement, or blending technique is off. These common problems have simple fixes:
- Using a shade that's too warm: Save orange or golden shades for bronzing. Choose a more neutral contour that resembles an actual shadow on your skin.
- Drawing thick stripes: Pick up less product and apply it in dots or short strokes. Thin layers give you more control.
- Placing cheek contour too low: Keep it directly beneath the cheekbone and blend upward. Low placement can visually pull the cheeks down.
- Blending too far: Blend the edges, but don't spread the pigment across the entire cheek. Otherwise, you'll lose the definition you created.
- Using the same pressure everywhere: Apply lighter pressure near the center of the face and slightly more near the hairline, where shadows are naturally deeper.
- Skipping the ears and neck check: If your contour is visible along the jaw or hairline, lightly diffuse it into the surrounding skin.
- Adding more before stepping back: Check your makeup from arm's length. What seems subtle in a magnifying mirror may look much stronger from a normal distance.
I've found that a clean sponge with a trace of leftover foundation is handy for softening stubborn edges. Press it over the boundary of the contour rather than wiping, which can disturb everything underneath.
The Bottom Line
The simplest approach to how to contour for beginners is to use a shadow-like shade, apply very little product, and blend upward in thin layers. Begin beneath the cheekbones, add forehead or jaw contour only if you want it, and check the finished makeup in daylight.
Cream contour sticks offer easy placement, while pressed powders provide gradual color and a softer learning curve. Whichever formula you choose, pay attention to undertone, ingredient compatibility, and packaging you'll realistically use up. Makeup should work for your face and your routine—not the other way around.
For more ingredient-conscious beauty tips and wallet-friendly finds, sign up for Insider Beauty's weekly deals. We'll send the good stuff without crowding your inbox.
Want more tips and exclusive beauty deals delivered to your inbox? Pop your email in the box below and join thousands of insiders who save big every week.