
Here’s how to fix a broken nail at home: trim and smooth any loose edge, then reinforce a small split with nail glue and a tea bag or nail-repair wrap. The patch acts like a temporary splint because the nail plate is made of dead keratin and can’t fuse back together. If the crack reaches pink tissue, is bleeding, or involves a partly detached nail, skip the glue and treat it as an injury.
I punti essenziali
- Patch only the nail plate: Nail glue shouldn’t touch an open wound, exposed nail bed, or irritated skin.
- Use a thin repair material: A paper tea bag or a silk or fiberglass nail wrap provides support without creating a bulky ridge.
- Keep the nail short: Less length means less leverage on the crack, which lowers the chance of another painful tear.
- Protect the repair from water: Long showers, dishwashing, and swimming can weaken the adhesive.
- Know the red flags: Significant bleeding, severe throbbing, infection, or a nail lifting from the base needs medical care.
Can You Repair Every Broken Nail at Home?
You can usually repair a small horizontal or vertical split limited to the white or clear portion of the nail. A superficial crack that hasn’t reached the pink nail bed is a good candidate for a patch.
Look, a repair doesn’t actually heal the nail plate. Nails are layers of hardened keratin cells, so once they split, they don’t biologically knit together like skin does. Glue and wrap simply hold those layers in place while the damaged area grows out.
A fingernail grows about 3 millimeters per month, although age, health, medications, and the specific finger can affect that rate. Replacing an entire fingernail generally takes four to six months; a toenail may need 12 to 18 months.
Don’t attempt a cosmetic repair when:
- The split extends into pink, tender tissue.
- Blood is coming from beneath or around the nail.
- The nail is lifting near the cuticle or partly torn off.
- There’s a large dark-purple area under the nail with throbbing pain.
- The finger or toe looks bent, numb, or unusually swollen.
- Redness, warmth, pus, or worsening pain suggests infection.
Honestly, pain is a useful dividing line. A crack in the free edge may feel annoying, but a painful break often means living tissue underneath has been affected.
What Do You Need to Repair a Broken Nail?
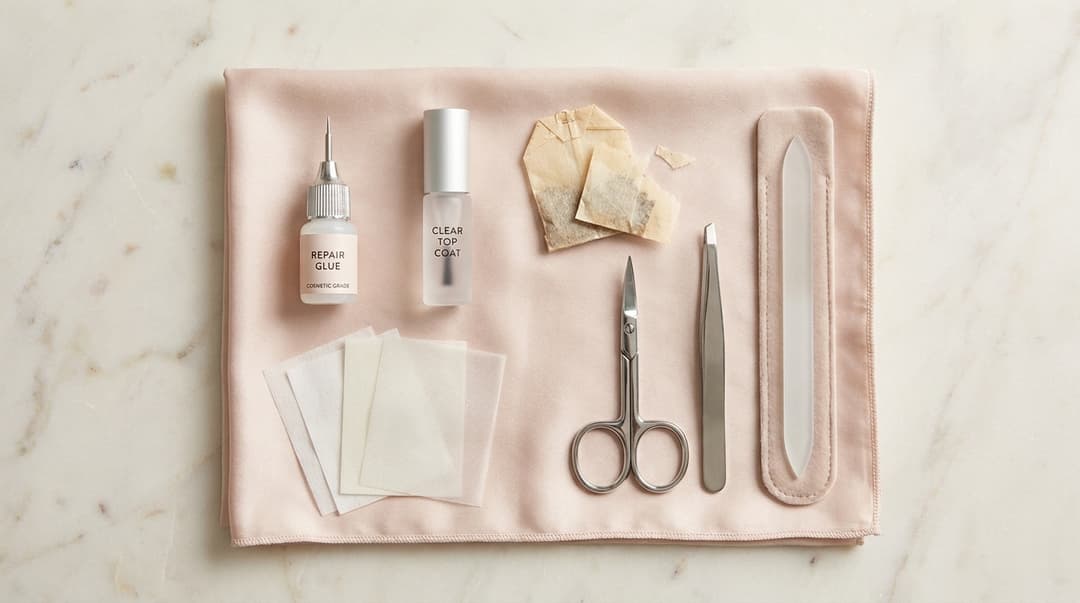
Gather everything before you begin so you’re not rummaging through a drawer with a fragile nail. You’ll need:
- Soap and clean running water
- Nail clippers or small manicure scissors
- A fine-grit nail file
- Cosmetic nail glue
- A paper tea bag or a silk or fiberglass nail-repair wrap
- Clean tweezers
- A clear top coat
The three most useful product types are cosmetic nail glue, a silk or fiberglass repair wrap, and clear top coat. A dry paper tea bag also works in a pinch, but avoid cotton, tissue, or fuzzy fabric. Cyanoacrylate adhesive can react with cotton and generate heat, and loose fibers make the patch lumpy.
Use nail glue made for cosmetic nail repairs rather than runny household superglue. Both may contain cyanoacrylate, but household formulas aren’t designed for controlled application around nails. No matter which cosmetic glue you use, keep it away from your eyes, mouth, skin, and any open cut.
How to Fix a Broken Nail at Home Step by Step
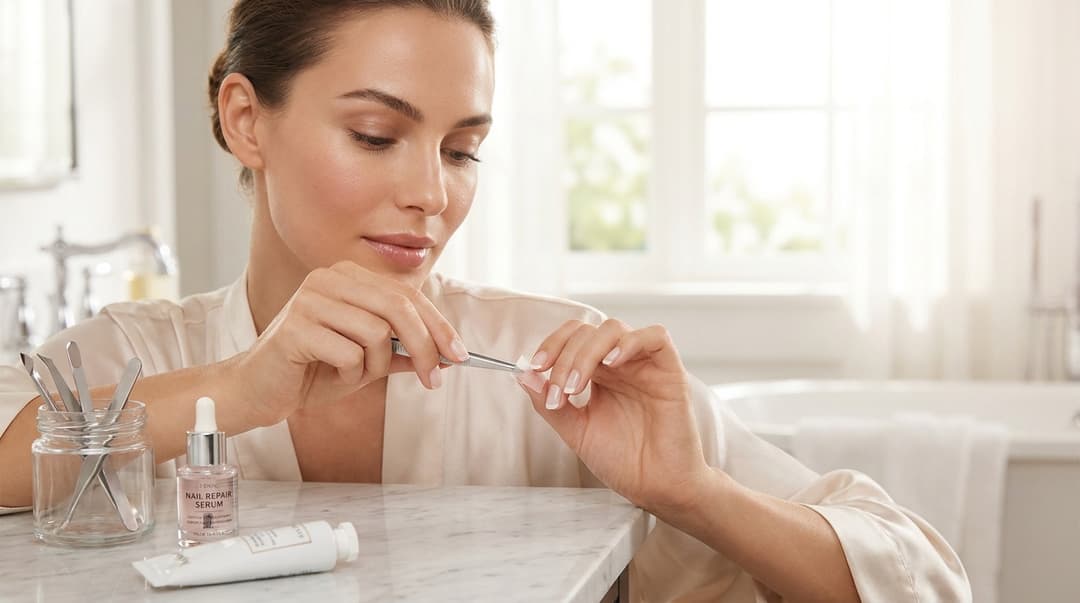
This method is for a clean, minor crack that remains entirely on the hard nail plate. If the area is bleeding, stop and move to basic wound care instead.
Wash your hands and nail. Use mild soap and running water to remove dirt and oils. Pat everything completely dry because moisture interferes with adhesion.
Assess the depth of the crack. Confirm that it doesn’t reach the pink nail bed and that the nail is still firmly attached. Don’t poke beneath the split to test it.
Trim only the loose edge. Use clean clippers to shorten excess length and remove a fully detached snag. Never cut into attached nail or pull a cracked section away from the nail bed.
Smooth the edge gently. File in one direction with a fine-grit file. Aggressive back-and-forth filing can widen the split and thin an already fragile nail.
Cut the patch to size. Make a small piece of tea bag paper or nail wrap that covers the crack and extends roughly 1 to 2 millimeters beyond it on each side. Smaller is usually neater and more comfortable.
Apply a tiny amount of nail glue. Place a thin layer over the cracked nail plate without flooding the cuticle or sidewalls. More glue doesn’t mean a stronger repair; it usually means a stiff, bulky patch.
Position the patch. Use tweezers to lay the material flat over the split. Press it down with the tweezers rather than your fingertip, then let it dry according to the glue directions.
Add one more thin layer. Brush a small amount of nail glue over the patch to saturate and seal it. Allow it to dry fully in a well-ventilated room.
Refine the surface. Very lightly buff any rough edge. Don’t file through the patch or aggressively buff the surrounding natural nail.
Seal with clear top coat. Apply one thin coat over the whole nail to smooth the finish and provide a little extra water resistance.
When people ask me how to fix a broken nail at home, I usually recommend keeping the patch as thin as possible. I’ve found that thick repairs catch on hair and clothing, which can put even more force on the original crack. If the repair keeps snagging, shorten the nail further rather than piling on more glue.
How Do You Care for a Patched Nail?

For the first few hours, keep the nail dry and avoid using it as a tool. That means no opening cans, scraping labels, or picking at tight knots. It sounds obvious, but those everyday moves create a surprising amount of leverage.
To help the patch last:
- Wear gloves while washing dishes or cleaning.
- Reapply clear top coat every two to three days if the surface starts wearing away.
- Keep the nail shorter than the others until the split grows out.
- Apply cuticle oil or a fragrance-free hand cream around the nail daily.
- Remove lifting material instead of gluing over dirt or moisture.
Hydration helps surrounding skin and may improve nail flexibility, but it won’t repair the existing crack. Frequent wet-dry cycles, acetone, harsh cleaning chemicals, and repeated gel removal can make nails more brittle.
If the patch lifts, don’t peel it off. Peeling can remove superficial layers of the natural nail. Follow the nail-glue manufacturer’s removal directions, which may involve an acetone-based remover, and stop if the process causes pain. Never soak a nail with broken skin in acetone because it can sting and worsen irritation.
When Does a Broken Nail Need Medical Care?
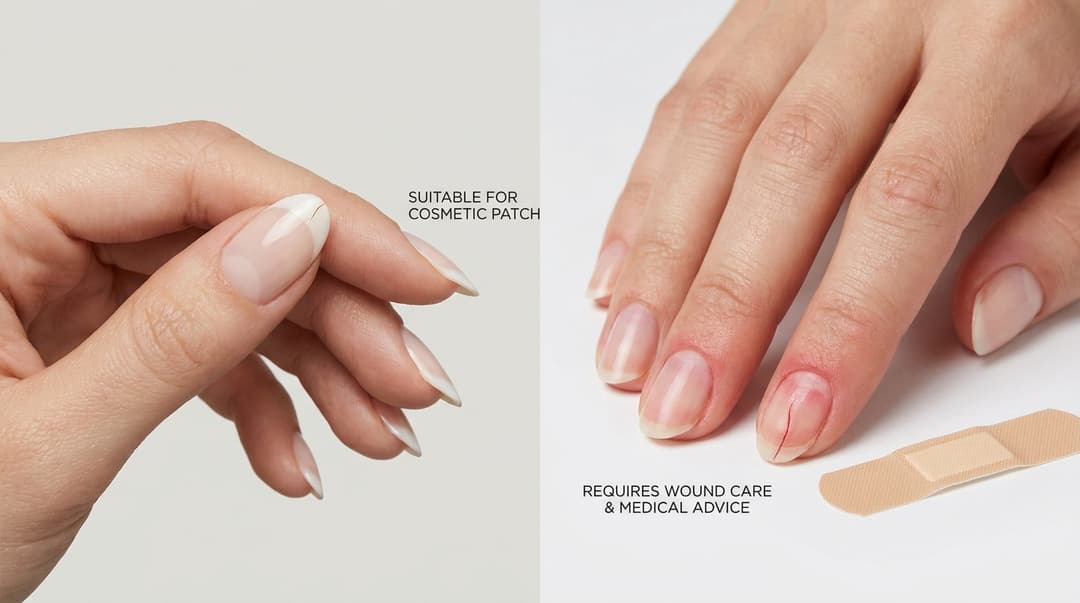
If the break reaches the nail bed, rinse it gently with clean water and apply steady pressure with gauze for about 10 minutes. Once bleeding is controlled, add a thin layer of petroleum jelly and cover it with a nonstick bandage. Don’t put nail glue, polish, or remover on the wound.
Seek prompt medical care if:
- Bleeding doesn’t stop after 10 to 15 minutes of firm pressure.
- The nail is torn near its base or trapped beneath the surrounding skin.
- Pain is severe, throbbing, or getting worse.
- A large amount of blood collects under the nail.
- You can’t bend the finger or toe normally.
- Redness spreads or you develop warmth, swelling, pus, or fever.
- The injury came from a crush, dirty object, animal bite, or human bite.
A clinician may need to drain trapped blood, repair a nail-bed cut, check for a fracture, or update tetanus protection. Don’t try to burn or drill a hole through the nail yourself—that DIY trick can cause burns, infection, and further injury.
People with diabetes, poor circulation, reduced sensation, or a weakened immune system should be more cautious, particularly with toenail injuries. In those cases, even a small wound deserves a call to a healthcare professional.
Il nostro consiglio
The safest approach to how to fix a broken nail at home is to shorten the nail, smooth the snag, and place a thin glue-and-wrap patch over a minor crack that affects only the hard nail plate. Keep it dry, protect it from impact, and maintain the patch until the split grows close enough to the edge to trim away.
If you can see blood or tender pink tissue, think wound care—not manicure. A clean bandage and proper medical evaluation are much safer than sealing an injured nail with glue.
For more practical beauty advice and worthwhile product finds, sign up for Insider Beauty’s weekly deals.
Vuoi altri consigli e offerte beauty esclusive nella tua casella di posta? Inserisci l’e-mail qui sotto e unisciti alle migliaia di lettori che ogni settimana trovano occasioni per risparmiare.