
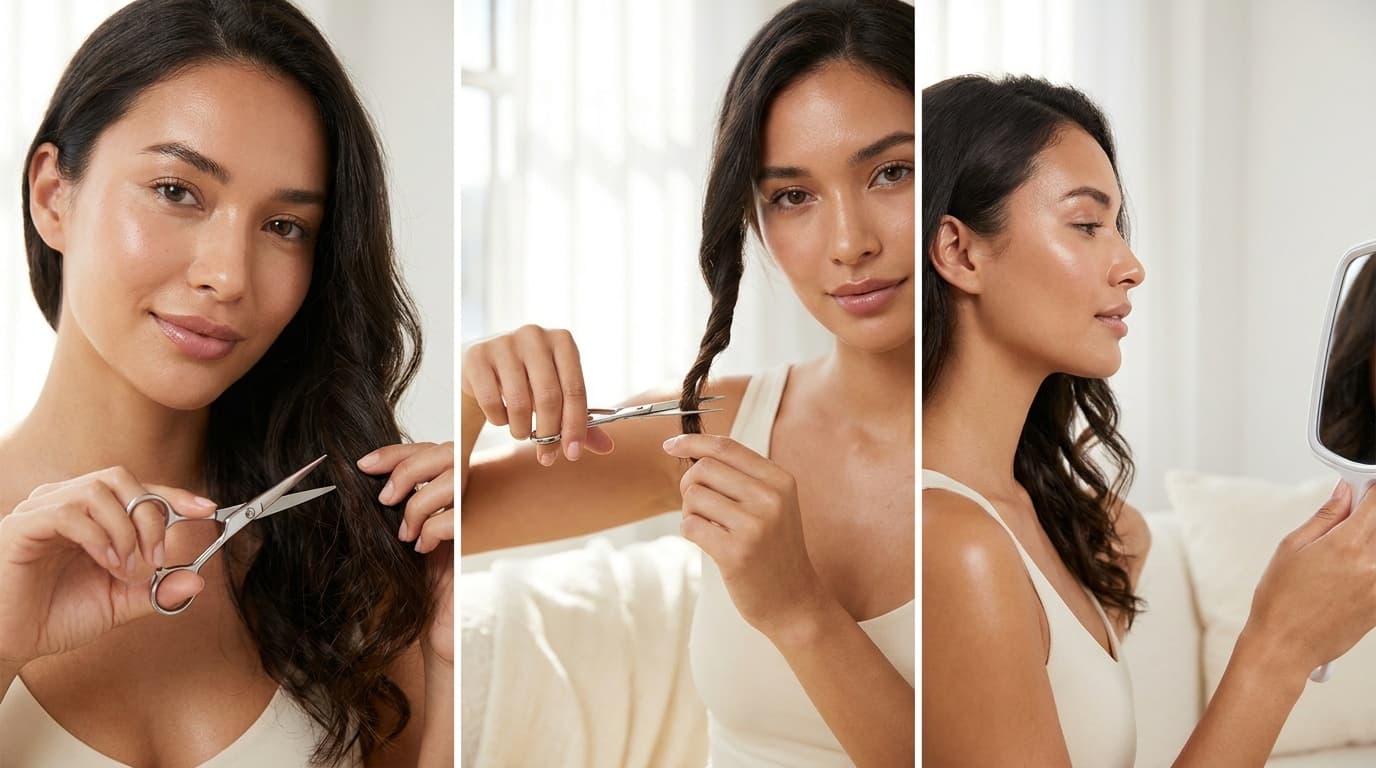
The safest way to learn how to trim split ends at home is to work on clean, fully detangled hair, use sharp haircutting shears, and remove only the damaged tips in small sections. Trimming eliminates splits before they travel farther up the hair shaft, but cutting too much or using dull scissors can create unevenness and more fraying.
Les points essentiels
- Use real haircutting shears: Kitchen, craft, and office scissors can crush or bend the hair fiber instead of making a clean cut.
- Trim conservatively: Cut about 1/4 inch above the visible split so the weakened portion is fully removed.
- Work in small sections: Good lighting and controlled sections reduce the risk of taking off more length than intended.
- Adjust for your texture: Straight, wavy, curly, and coily hair don't necessarily need the same trimming technique.
- Remember that products can't fuse split ends permanently: Conditioning products may smooth the cuticle temporarily, but only scissors remove an existing split.
Can You Really Remove Split Ends at Home?
Yes, you can remove minor split ends at home as long as you have good visibility, sharp tools, and realistic expectations. The goal isn't to recreate a complicated salon haircut. It's to dust the ends, meaning you remove a very small amount of damaged hair while preserving the overall shape.
Split ends, medically called trichoptilosis, develop when the protective outer cuticle wears away and exposes the inner hair fiber. Heat styling, chemical processing, ultraviolet exposure, rough brushing, and everyday friction can all contribute. Because the visible hair shaft is made of nonliving keratin, it can't biologically heal itself once it splits.
Look, this is where product marketing can get a little fuzzy. A leave-in conditioner may coat the strand and make frayed ends look smoother, but that effect is temporary. Cutting is the only way to remove a true split end.
I've found that at-home trimming works best for scattered splits and light maintenance. If the ends are severely thinned, splitting several inches upward, or part of an uneven haircut, a professional trim is usually the less stressful option.
What Tools Do You Need to Trim Split Ends?
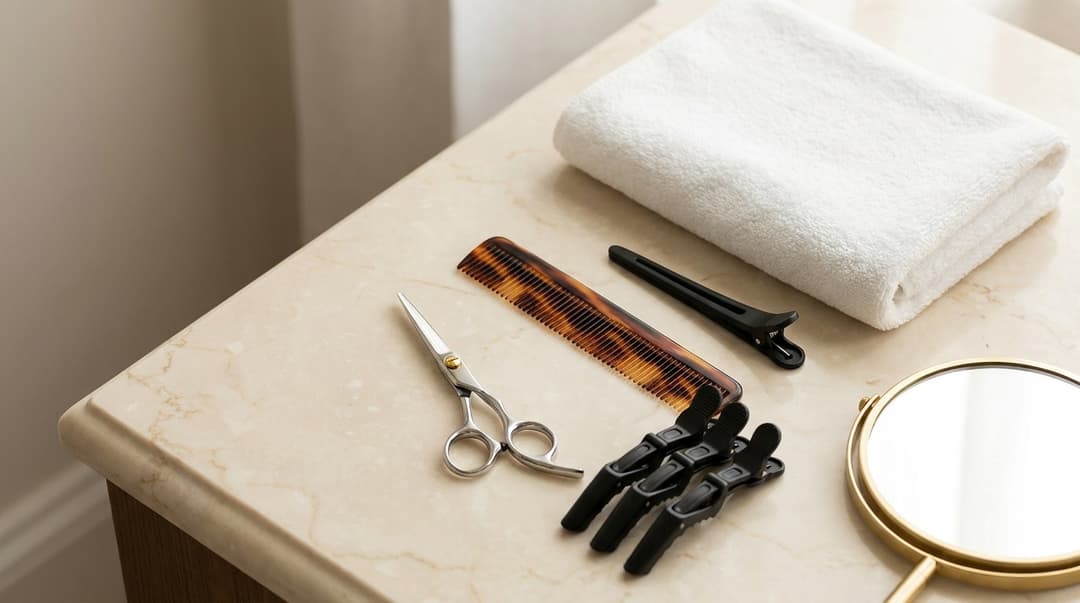
Gather everything before you start. Walking around with half-sectioned hair while looking for a clip is, honestly, how rushed mistakes happen.
You'll need:
- Sharp haircutting shears: Choose a small pair designed specifically for hair and reserve them only for trims.
- A fine-tooth or detangling comb: The right choice depends on your texture and how much tension your hair tolerates.
- Sectioning clips: These keep untreated hair out of the way and help you work methodically.
- A mirror and bright lighting: Natural daylight or a strong front-facing light makes translucent splits easier to see.
- A plain background: Dark hair is easier to inspect against a light shirt or towel, while light hair stands out against a dark background.
Clean the shear blades according to the manufacturer's directions before and after use, and don't share them. Never use razors, nail scissors, or dull household scissors. A blunt blade can fold the strand before cutting it, leaving a rough edge that frays faster.
How to Trim Split Ends at Home Step by Step

For most people, dry hair provides the best control because you can see its true length and spot frayed ends more easily. Curly and coily hair should generally be trimmed in its natural, dry pattern unless you're experienced with wet cutting and shrinkage.
Wash and condition your hair. Remove heavy styling buildup so individual strands are easier to inspect. Skip thick oils or styling creams before the trim because they can disguise damaged ends.
Dry your hair completely. Air-dry or use low heat. If you blow-dry, apply a heat protectant first and avoid pulling aggressively with a brush.
Detangle gently. Begin at the ends and work upward. Forcing a comb through knots can produce fresh breakage before you've even started trimming.
Divide the hair into manageable sections. Four to eight sections work for many people, though very dense hair may require more. Clip each section securely.
Release one narrow section. Work with a piece no wider than about 1 inch. Comb it smooth without stretching it excessively.
Inspect the final inch of hair. Look for Y-shaped forks, white dots, feathered tips, or strands that split into several branches. These are common signs of structural damage.
Cut above the split. Position the shears perpendicular to the strand and snip about 1/4 inch above the visible damage. Cutting directly through the frayed area can leave weakened fiber behind.
Use the twist method for scattered splits. Loosely twist a small section and trim only clearly damaged tips that protrude. Don't cut every short hair you see; some may be healthy new growth.
Compare both sides as you work. Bring matching front sections forward and check their length. Keep your head level because tilting it can create an uneven result.
Stop before you begin chasing perfection. If you keep finding damage farther up the shaft or feel tempted to redesign the shape, put down the scissors and schedule a professional cut.
This method of how to trim split ends at home is intentionally conservative. You can always remove another tiny amount, but you can't put length back once it's cut.
What Mistakes Cause More Damage?

The most common at-home trimming mistake is cutting large sections all at once. Hair density and growth patterns can hide uneven strands, so a thick horizontal chop is harder to control than small, deliberate snips.
Try to avoid these habits:
- Using dull or multipurpose scissors: They may crush the cuticle and leave a ragged edge.
- Cutting wet curls without accounting for shrinkage: Curly and coily hair can look significantly shorter once dry.
- Pulling hair under heavy tension: The section may spring back to a different length after you release it.
- Trimming in poor lighting: Split ends can be nearly transparent, especially on fine or light-colored hair.
- Cutting every flyaway: Short strands aren't automatically broken; they may be healthy regrowth.
- Trying candle cutting: Burning split ends carries an obvious risk of burns and can thermally damage nearby hair.
After trimming, apply a small amount of leave-in conditioner from the mid-lengths to the ends. This reduces friction and improves manageability, though it won't permanently repair remaining splits. Use a heat protectant before hot tools, lower the temperature when possible, and avoid repeatedly passing an iron over the same section.
Gentle handling matters too. Pat wet hair with a soft towel rather than rubbing it, detangle from the bottom upward, and consider a loose braid or smooth pillowcase at night if your hair tangles easily.
How Often Should You Trim, and When Is a Pro Better?

Most people can consider a light trim every 8 to 12 weeks, but there's no universal schedule. Chemically lightened, frequently heat-styled, or very fine hair may show damage sooner. Hair that receives minimal heat and chemical processing may go longer between trims.
Rather than trimming automatically, check for concrete signs:
- The ends feel rough even after conditioning.
- Tangles repeatedly form in the bottom inch.
- You can see forks, white dots, or feathering.
- The perimeter looks thin or see-through.
- Breakage is making it difficult to retain length.
See a stylist when you want to change the haircut's shape, remove more than an inch, add layers, or correct unevenness. A professional is also better equipped to assess extensive chemical or heat damage.
Talk with a board-certified dermatologist if breakage occurs close to the scalp or comes with sudden shedding, bald patches, scalp pain, itching, scaling, or redness. Those symptoms may involve a scalp or hair-loss condition rather than ordinary split ends.
Notre conclusion
The key to how to trim split ends at home is simple: use sharp haircutting shears, work in small sections, and cut slightly above each visible split. Keep the trim conservative, especially if your hair is curly, layered, chemically processed, or prone to shrinkage.
So, don't worry about making every strand perfectly uniform in one session. A careful dusting can make the ends look fuller and prevent existing splits from traveling, while gentle detangling, conditioning, and reduced heat exposure help limit future damage.
For more dermatologist-backed beauty tips and smart product finds, sign up for Insider Beauty's weekly deals.
Vous souhaitez recevoir d’autres conseils et des offres beauté exclusives ? Saisissez votre adresse e-mail ci-dessous et rejoignez les milliers d’Insiders qui économisent chaque semaine.