The easiest way to do winged eyeliner is to map the angle first, draw the wing before lining the lash line, and connect the two with short, controlled strokes. This works because it gives you structure, symmetry, and a lot more control than trying to freehand the whole thing in one go. Here's exactly how to do winged eyeliner so it looks sharp, lifted, and actually wearable.
Quick Takeaways
- Start with the wing first: Drawing the flick before the lash line makes the shape easier to control.
- Use short strokes, not one long swipe: Small movements give you a cleaner, more even line.
- Follow your lower lash line angle: This usually creates the most flattering lift for your eye shape.
- Choose the right formula: A felt-tip pen, gel liner, or waterproof pencil can all work depending on your skill level.
- Clean up with concealer or micellar water: Most eyeliner mistakes are fixable in under a minute.
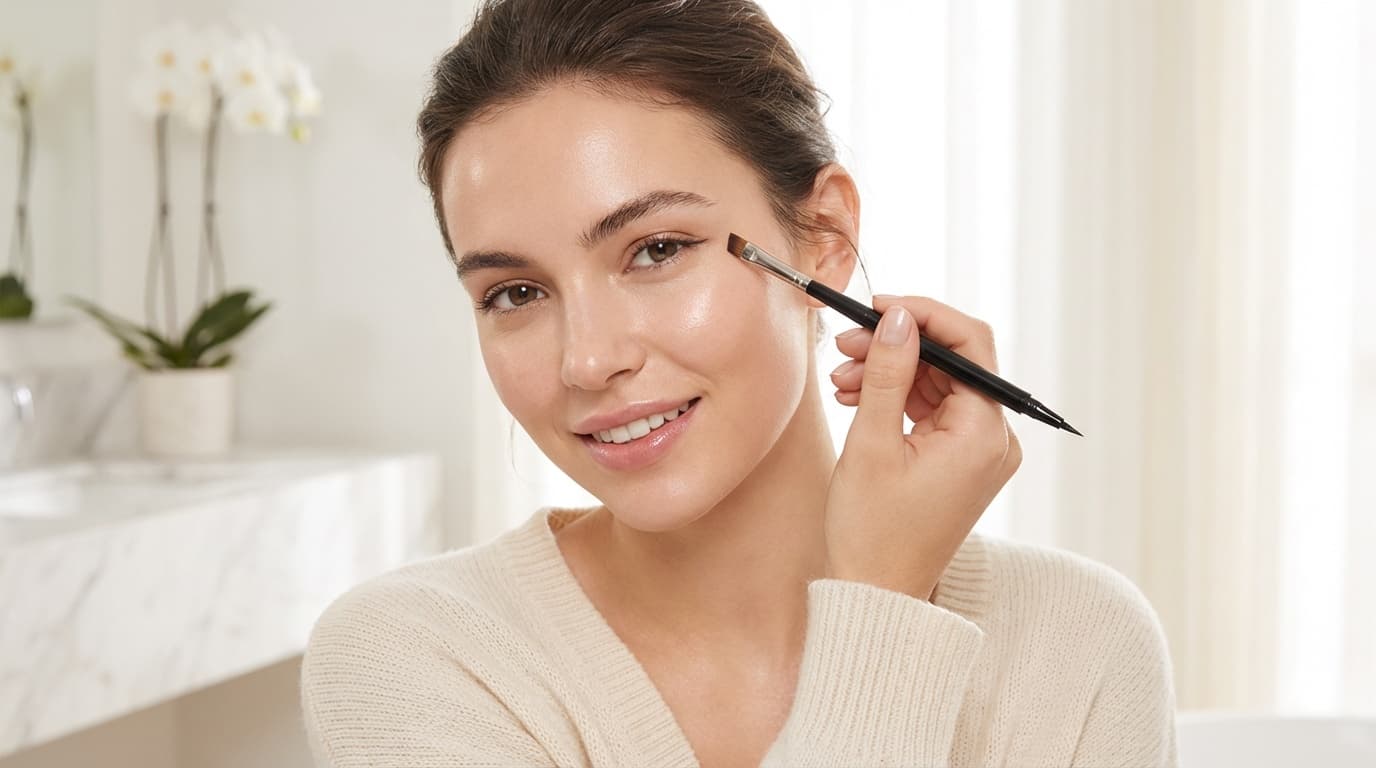
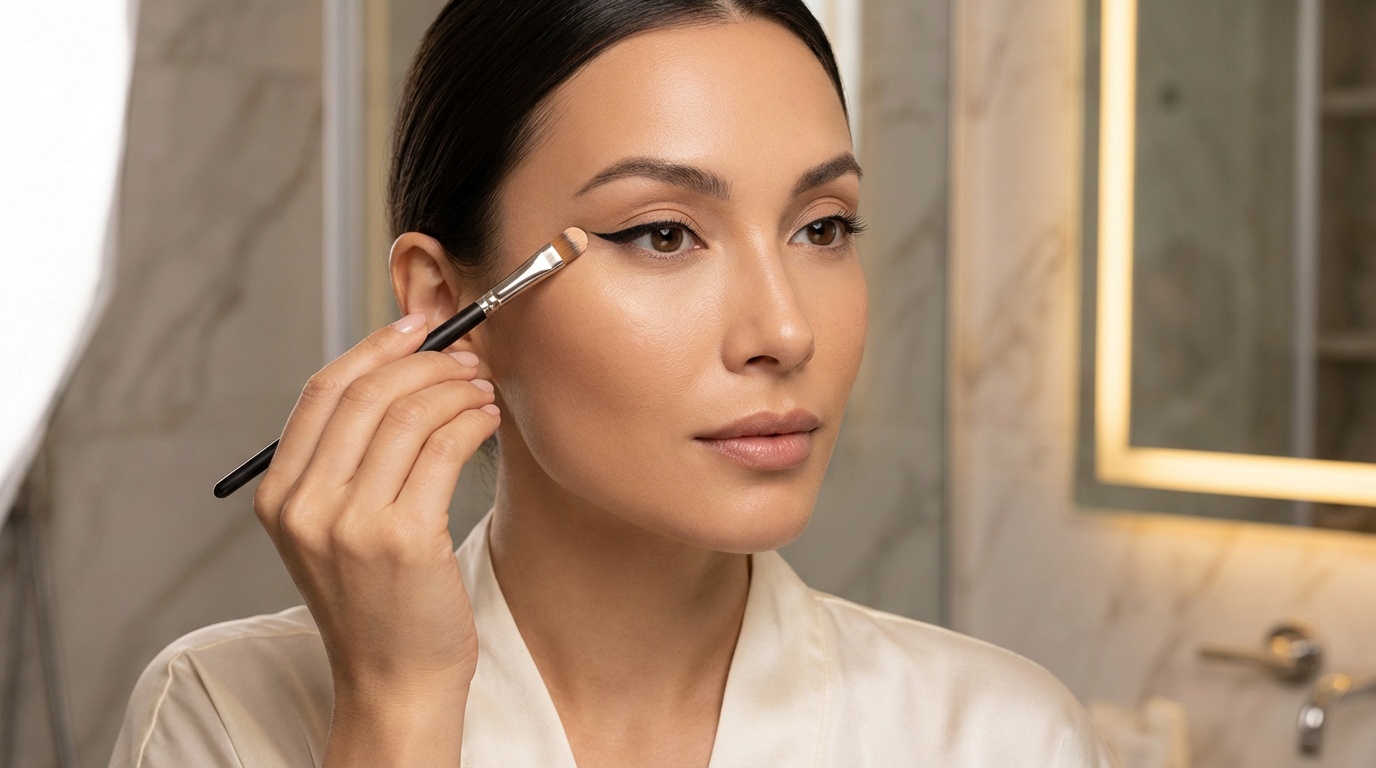
What do you need for winged eyeliner?
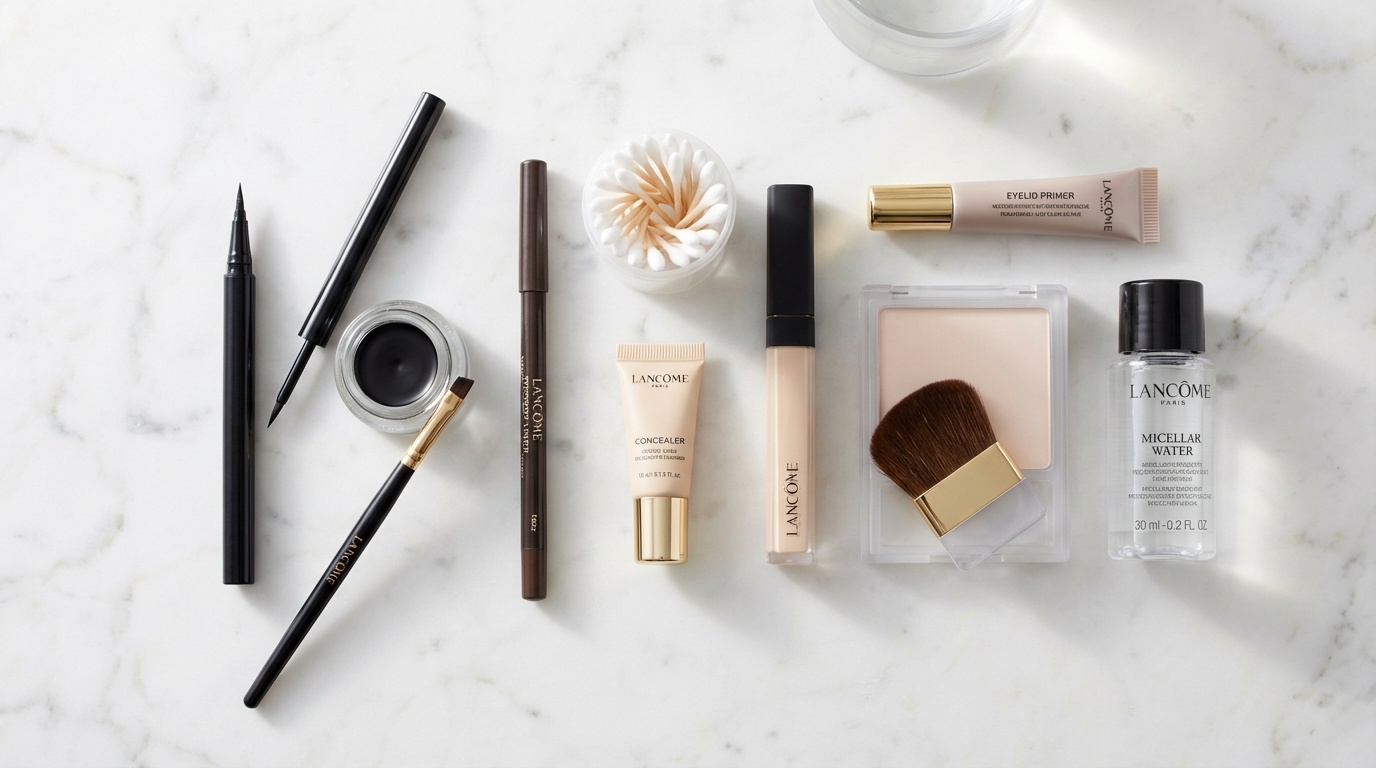
You don't need a giant kit, but the right tools make a noticeable difference. I've found that people often blame themselves when really they're fighting a formula that's too dry, too slippery, or just awkward to hold.
A few basics help:
- Eyeliner pen: Great for beginners because the tip gives more control and usually lays down even pigment.
- Gel eyeliner with an angled brush: Ideal if you want a very precise, customizable wing.
- Waterproof pencil liner: Softer and easier to smudge out, which is nice if you want a less harsh look.
- Cotton swabs or a flat brush: Helpful for cleanup.
- Concealer: Sharpens the edge fast.
- Eyelid primer or a little translucent powder: Helps prevent transfer, especially on oily lids.
If your eyelids get shiny or your liner tends to stamp onto your brow bone, prep matters. A thin layer of primer can improve wear time and reduce smudging by creating a drier, smoother surface.
How to do winged eyeliner step by step
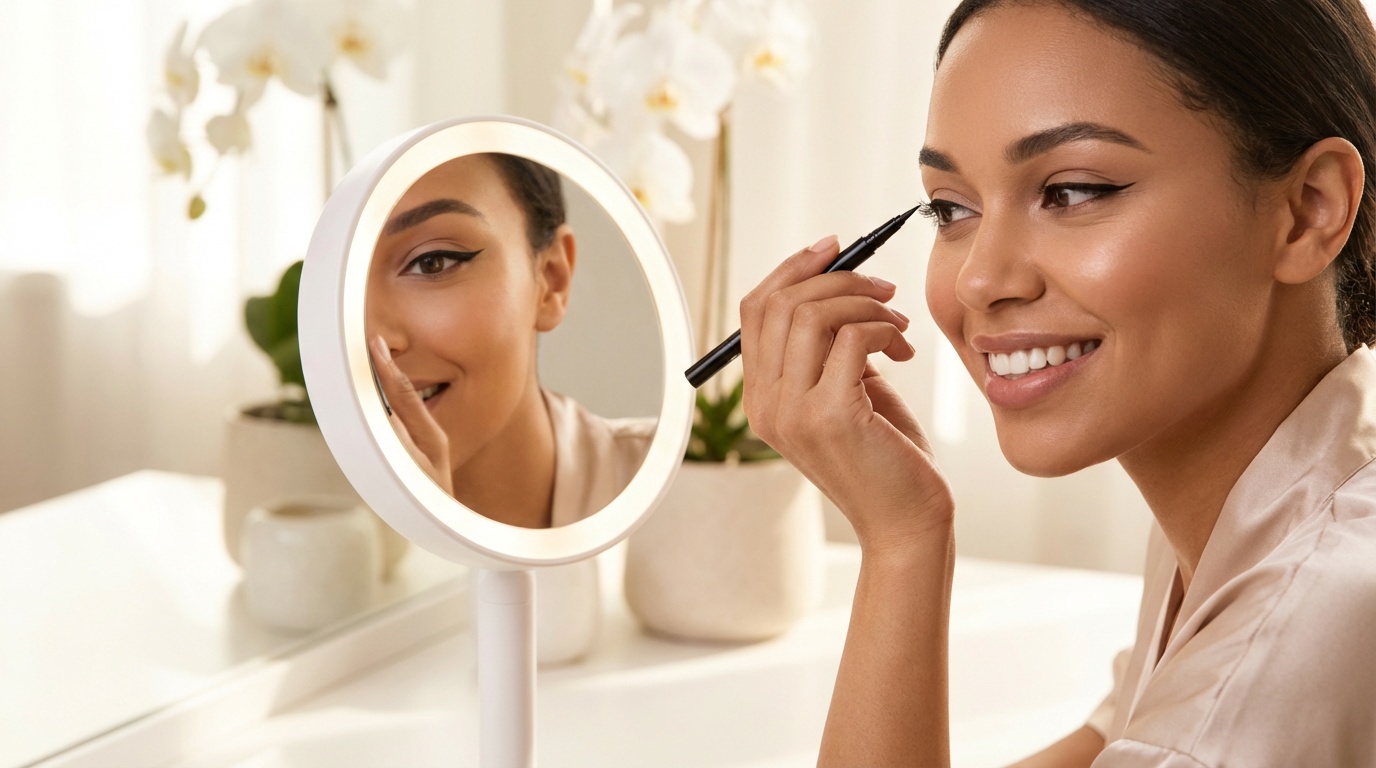
If you're learning how to do winged eyeliner, this is the method I recommend most often because it's simple and repeatable.
- Prep your eyelid with primer or a light dusting of powder.
- Look straight into a mirror with your chin slightly lifted.
- Use the angle of your lower lash line as a guide for the wing.
- Draw a short flick outward and slightly upward.
- Start at the upper lash line and draw inward or outward to connect to the tip of the wing.
- Fill in the small triangle you created.
- Thin out or thicken the line in tiny strokes, keeping the inner corner finer.
- Check both eyes with your face relaxed and eyes open.
- Clean the edge with a cotton swab, micellar water, or concealer.
- Let the liner dry fully before blinking hard or adding mascara.
A couple small things make a big difference here. Keep your elbow supported on a table if you can. And don't pull your eyelid too far to the side. That can distort the skin, so the wing looks straight when you're stretching it but oddly curved once you let go.
What angle should winged eyeliner be?
The most flattering wing usually follows the natural upward angle of your lower lash line. For many people, that's about a 10 to 20 degree lift, though it doesn't need to be exact.
So, if your wing keeps looking droopy, the issue is often the angle, not your technique. A wing that extends too horizontally can drag the eye down. One that shoots too high can look disconnected from the lash line.
Try this quick trick:
- Imagine an invisible line extending from your lower lash line toward the tail of your brow.
- Place a tiny dot where you want the wing to end.
- Connect that dot back toward your upper lash line.
Honestly, this tiny mapping step saves a lot of frustration.
How to do winged eyeliner for your eye shape
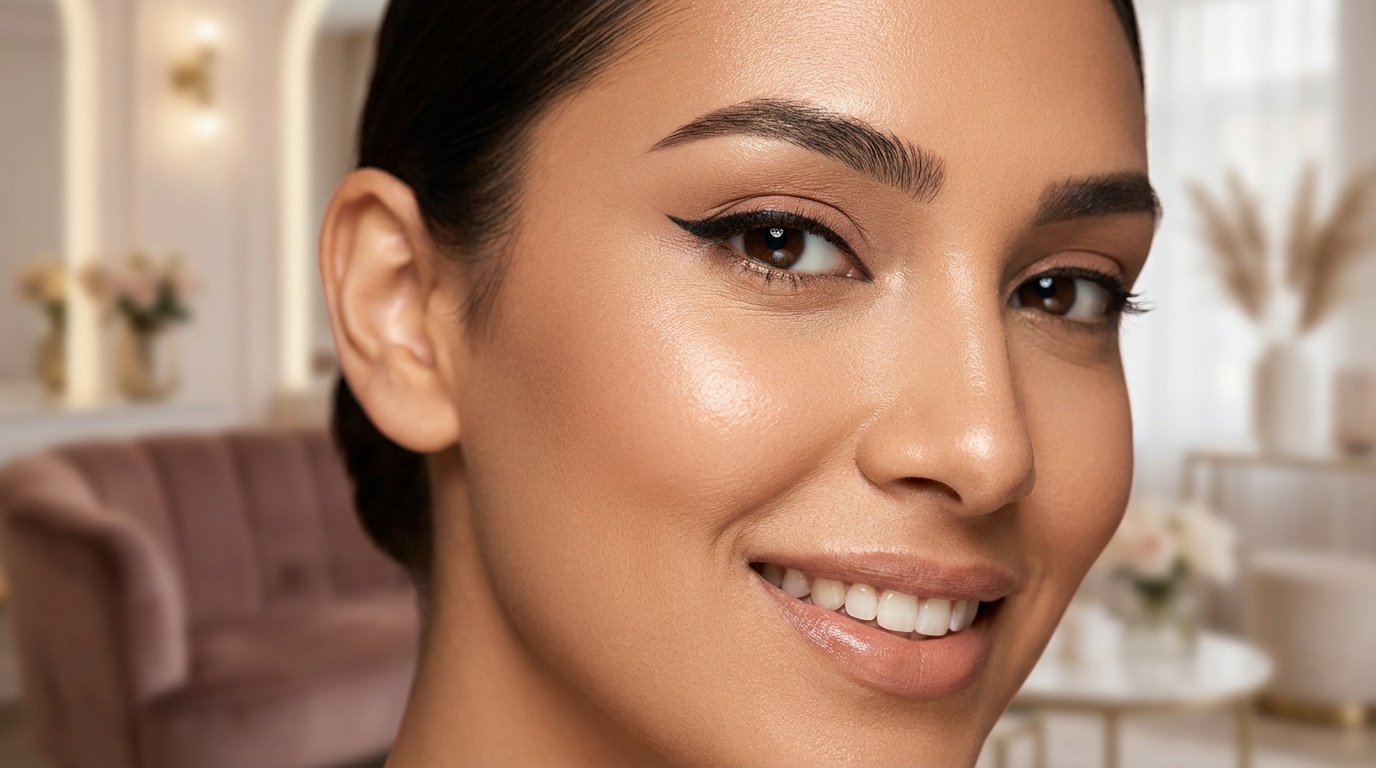
Not every wing should be drawn the same way. Eye anatomy matters, and adjusting for shape usually gives better results than copying a tutorial exactly.
Hooded eyes
For hooded lids, keep the wing visible when your eyes are open. Draw the flick with your eye relaxed, not closed, so you can see where the fold interrupts the line. A small, straighter wing often works better than a thick dramatic one.
Almond eyes
Almond eyes can usually handle most wing styles well. A thin line across the lid with a softly extended outer flick tends to look balanced and polished.
Round eyes
A slightly elongated wing can make round eyes look more stretched and lifted. Keep the line thinner in the center and extend outward rather than building too much height.
Monolids
For monolids, a bolder wing can show up better than an ultra-fine line. Waterproof formulas are especially helpful if your liner tends to transfer.
Downturned eyes
Keep the wing lifted and focused on the outer third of the eye. Avoid tracing too far down into the outer corner, since that can emphasize downturn.
I've found that the best wing is the one that works with your eye open and relaxed. Closed-eye perfection doesn't count for much if it disappears the second you blink.
Which eyeliner is best for beginners?
If you're new to how to do winged eyeliner, start with a felt-tip eyeliner pen. It's usually the easiest to control, and the pointed tip helps you sketch a flick without needing a separate brush.
Here's a quick breakdown:
- Eyeliner pen: Best for beginners, fast application, crisp finish.
- Gel liner: Best for precision and dramatic looks, but needs a steady hand.
- Pencil liner: Best for softer wings or smoky eyeliner, a little more forgiving.
Look for formulas labeled waterproof, smudge-resistant, or long-wear if your eyes water or your lids are oily. If you have sensitive eyes, choose something ophthalmologist-tested and avoid applying too close to the waterline if that area gets irritated easily.
Why does winged eyeliner look uneven?
This is probably the most common complaint, and usually there's a very normal reason. Human faces aren't perfectly symmetrical, so your eyes, brows, and lid folds may sit a little differently side to side. That means matching the wings exactly can be harder than it looks.
A few common causes of uneven eyeliner:
- Different wing angles: One flick follows the lash line, the other drifts flatter.
- Too much product at once: Thick lines are harder to correct.
- Looking down into the mirror: This changes the shape of the lid.
- Stretching one eye more than the other: It distorts the final result.
- Trying to make them identical: Aim for balance, not perfection.
Look, sisters-not-twins is a real thing with eyeliner. If they look even from a normal conversational distance, you're good.
How do you fix winged eyeliner mistakes?
Most eyeliner mistakes are repairable, even the messy ones. You usually don't need to remove all your eye makeup and start over.
Try these fixes:
- Dip a pointed cotton swab in micellar water to erase a crooked edge.
- Use a flat brush with concealer to sharpen the underside of the wing.
- If one wing is shorter, extend it slightly instead of thickening the other too much.
- If the line skips, go over the gaps once the first layer dries.
- If the wing gets too thick, soften it with dark eyeshadow and turn it into a smoky liner look.
One mistake I see a lot is people layering wet liner over and over. That tends to create cracking, patchiness, or transfer. Let each pass dry for a few seconds before going back in.
How to make winged eyeliner last all day
A sharp wing is great, but a wing that survives humidity, oily lids, and a long workday is even better.
To help it stay put:
- Prep oily lids: Use primer or a tiny bit of powder first.
- Choose a long-wear formula: Waterproof liners resist oil and tears better.
- Layer strategically: You can set pencil or gel liner with matching black or brown eyeshadow.
- Avoid heavy eye cream on the lid: Too much slip can break down the liner.
- Let it dry before blinking fully: This really helps prevent transfer.
If your outer corners water, keep the wing slightly away from the very wettest area. That small adjustment can improve wear more than switching products five times.
The Bottom Line
Learning how to do winged eyeliner gets much easier when you stop trying to draw one perfect line in a single shot. Map the angle, sketch the flick first, connect it with short strokes, and adjust based on your eye shape. With the right formula and a little cleanup, winged liner becomes a lot less intimidating and a lot more fun.
If you want more practical beauty tips and smart product picks without the guesswork, sign up for Insider Beauty's weekly deals.
Want more tips and exclusive beauty deals delivered to your inbox? Pop your email in the box below and join thousands of insiders who save big every week.