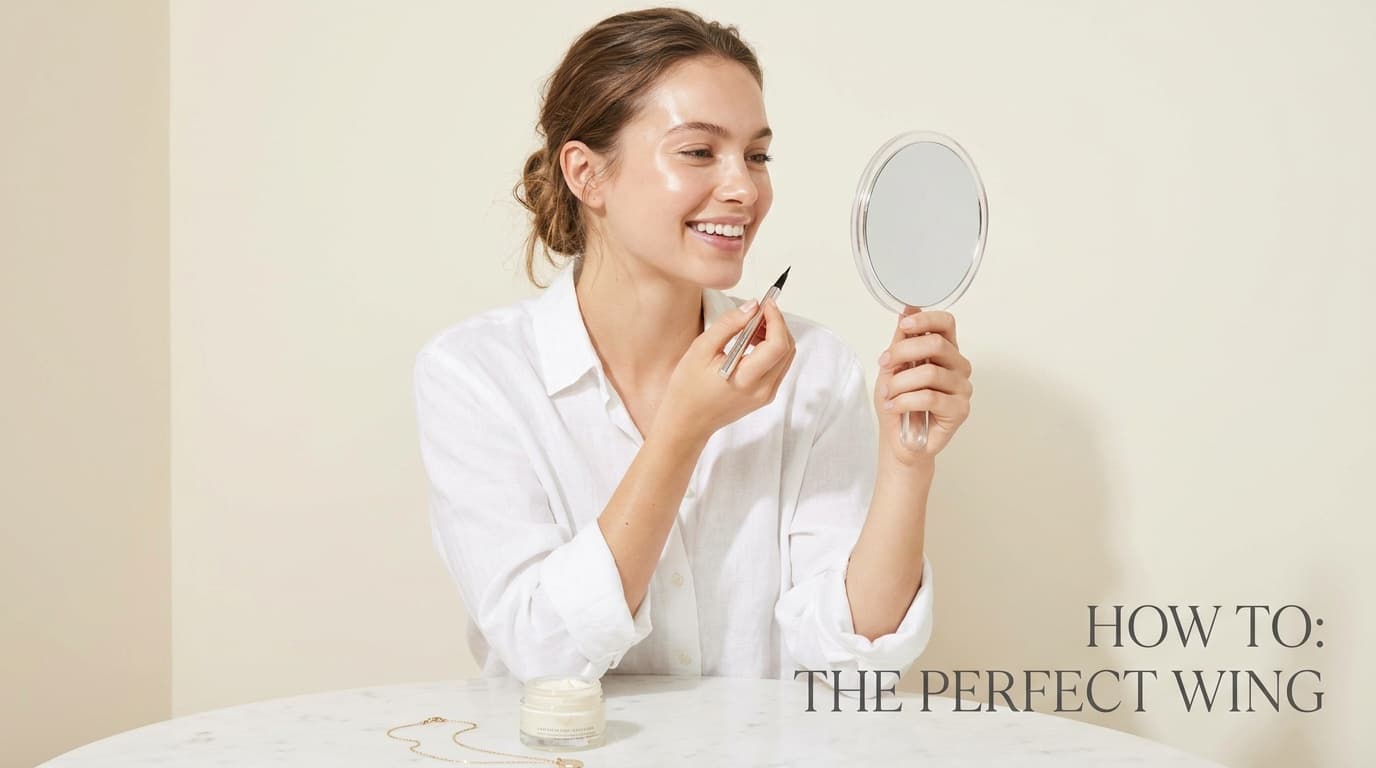
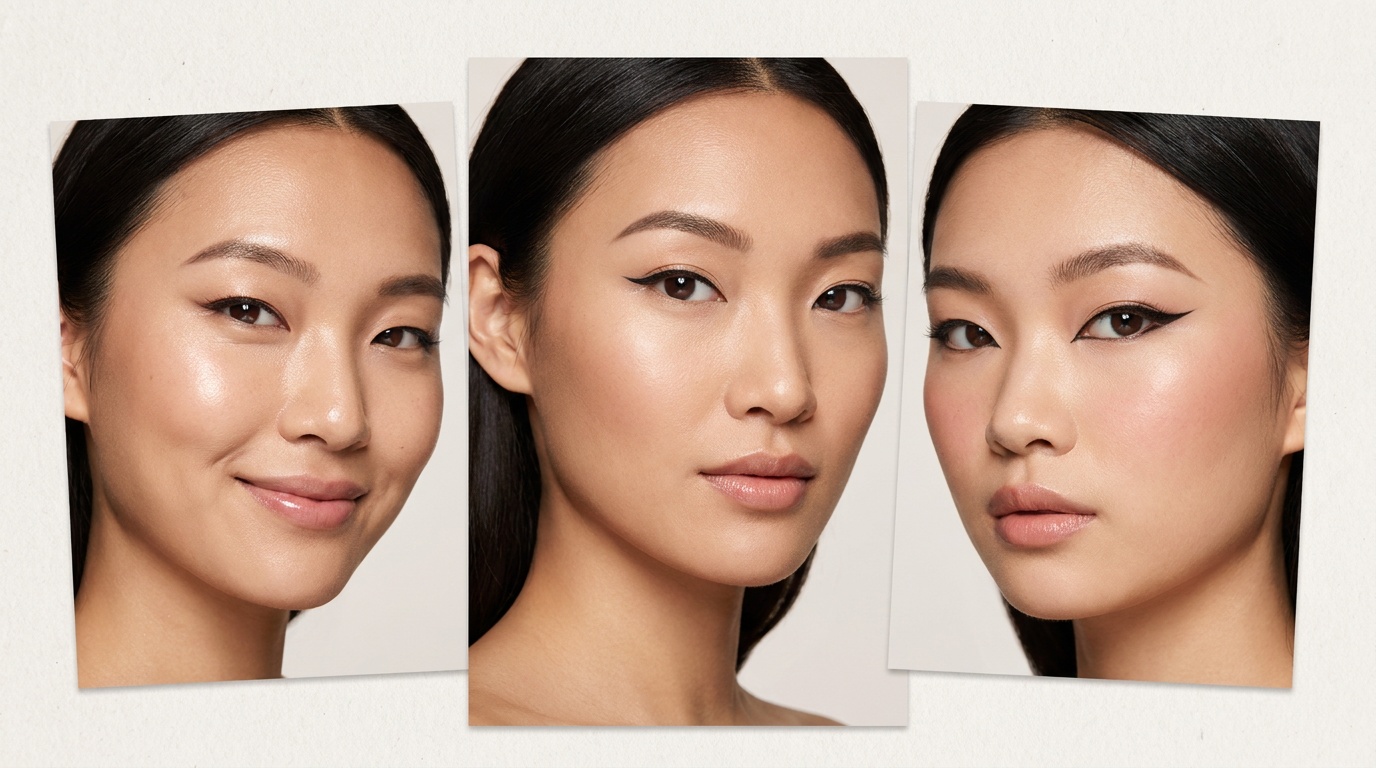
The easiest way to do winged eyeliner is to map the angle first, keep your line thin at the inner corner, and build the wing in small strokes instead of one big swipe. This works because winged liner looks cleaner when you use your eye shape as a guide rather than forcing a dramatic flick. Here’s exactly how to do winged eyeliner so it looks sharp, balanced, and wearable.
Quick Takeaways
- Start with the wing angle first: Follow the natural line from your lower lash line toward your brow tail.
- Use short strokes, not one long line: It gives you more control and helps prevent wobbling.
- Keep the inner line thin: Thickness should build gradually toward the outer corner.
- Choose the right formula: Felt-tip pens, gel eyeliner, and powder shadow liners all create different finishes.
- Clean up with concealer or micellar water: Small fixes can make your wing look way more polished.
What do you need to do winged eyeliner?
If you want to learn how to do winged eyeliner, the tools matter almost as much as technique. I’ve found that using the wrong applicator can make a very simple look feel weirdly impossible.
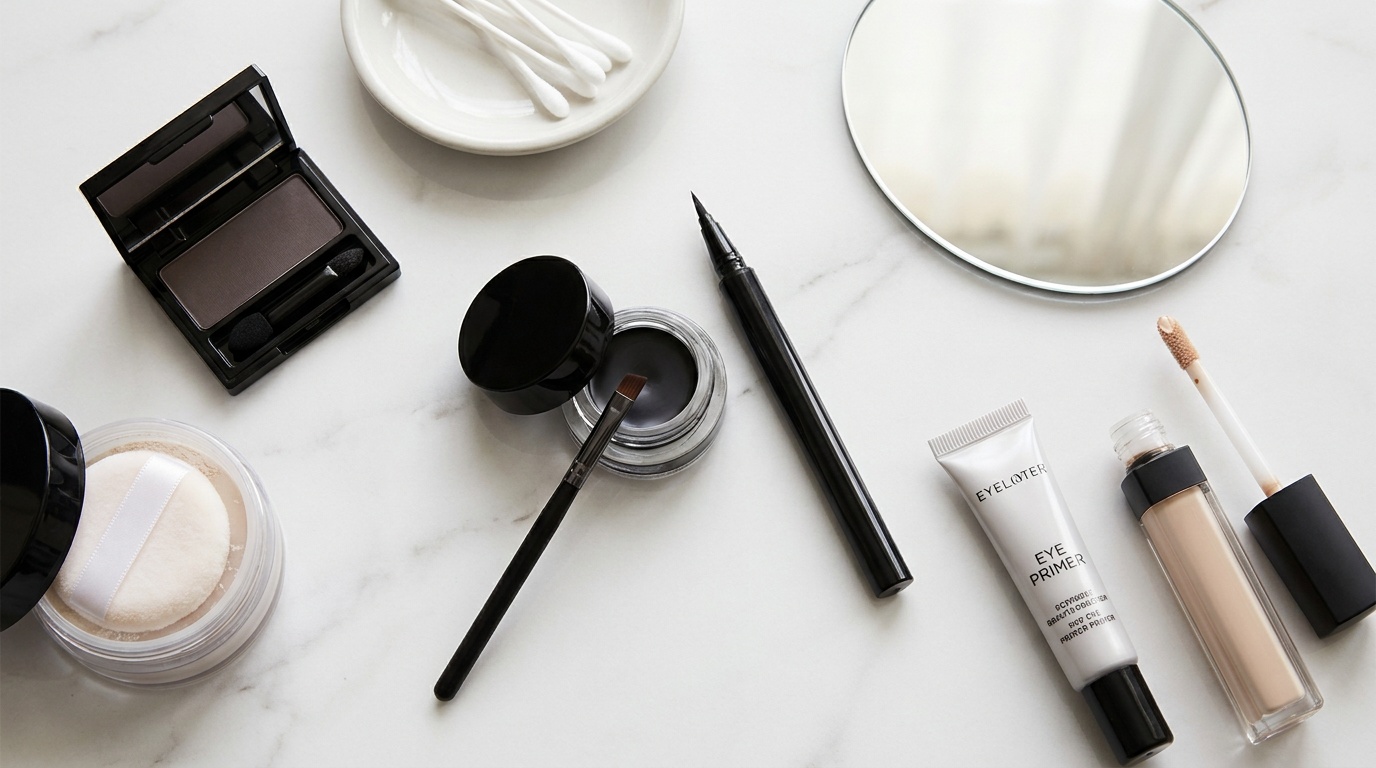
You don’t need a huge kit, though. A few basics will do it:
- Eyeliner pen: Great for beginners because the tip is easy to control and usually gives a clean, defined line.
- Gel eyeliner with an angled brush: Good if you want more flexibility and a softer or more dramatic wing.
- Dark powder eyeshadow: A nice option if you want a diffused wing that’s more forgiving than liquid.
- Primer or a light dusting of translucent powder: Helps reduce slipping, especially on oily lids.
- Cotton swab or small angled brush: For cleanup.
- Concealer: Sharpens the edge fast.
Honestly, if your eyelids get oily during the day, prep is not optional. A smooth, dry lid gives eyeliner something to grip onto, and cleaner ingredients matter here too since the eye area is delicate. I usually lean toward fragrance-free formulas around the eyes because less irritation means less blinking, watering, and smudging.
How to prep your eyelids for winged eyeliner
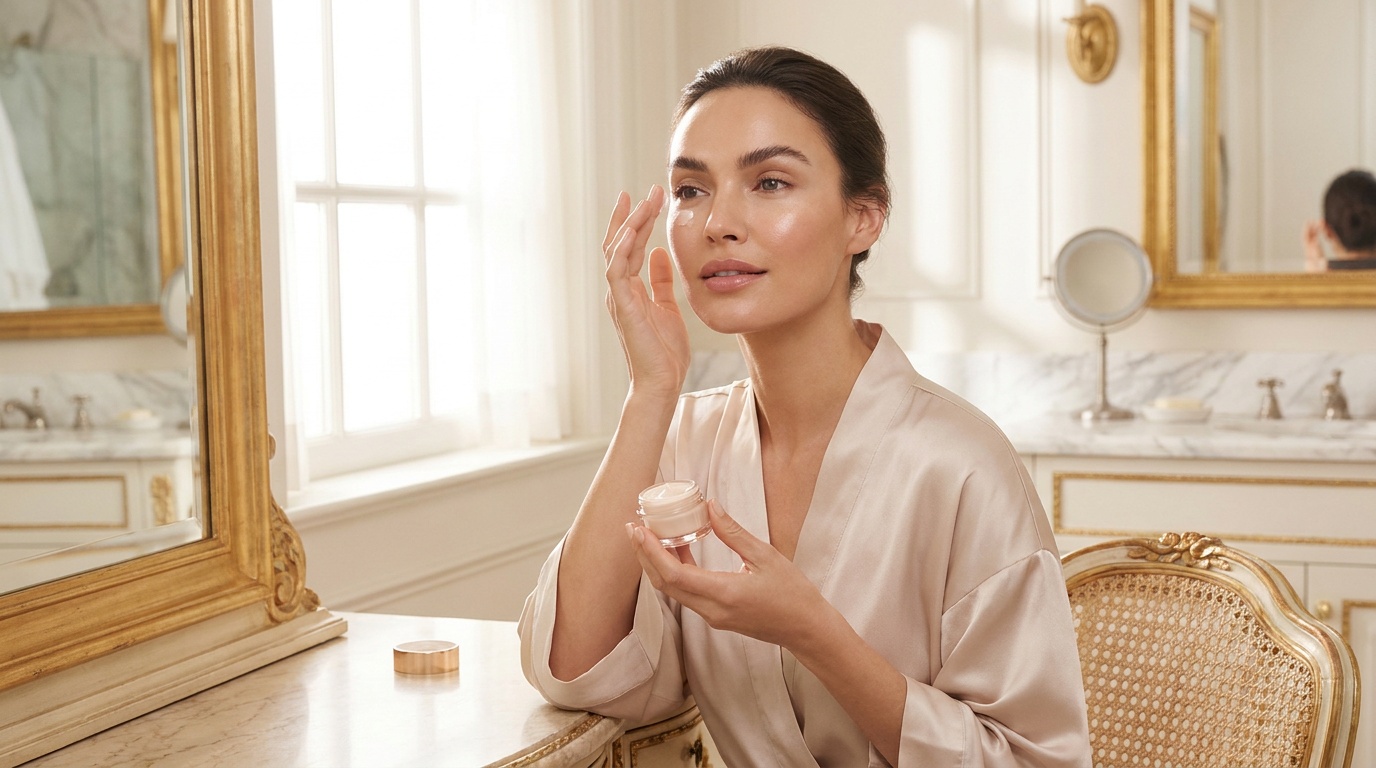
A lot of eyeliner frustration starts before the liner even touches your skin. If your lids are slick, textured, or still holding leftover skincare, the line can skip or transfer.
Here’s a simple prep routine:
- Start with clean, dry eyelids.
- Apply a tiny amount of eye primer or concealer.
- Set it lightly with translucent powder or a skin-toned shadow.
- Curl lashes before eyeliner, not after.
- Keep heavy eye cream away from the lash line during the day.
So, why does this matter? Because winged eyeliner needs a stable base. If the surface is too emollient, the wing can stamp onto your upper lid or break apart at the outer corner. I’ve found that even a quick dusting of powder can make liquid and gel formulas go on smoother.
How to do winged eyeliner step by step
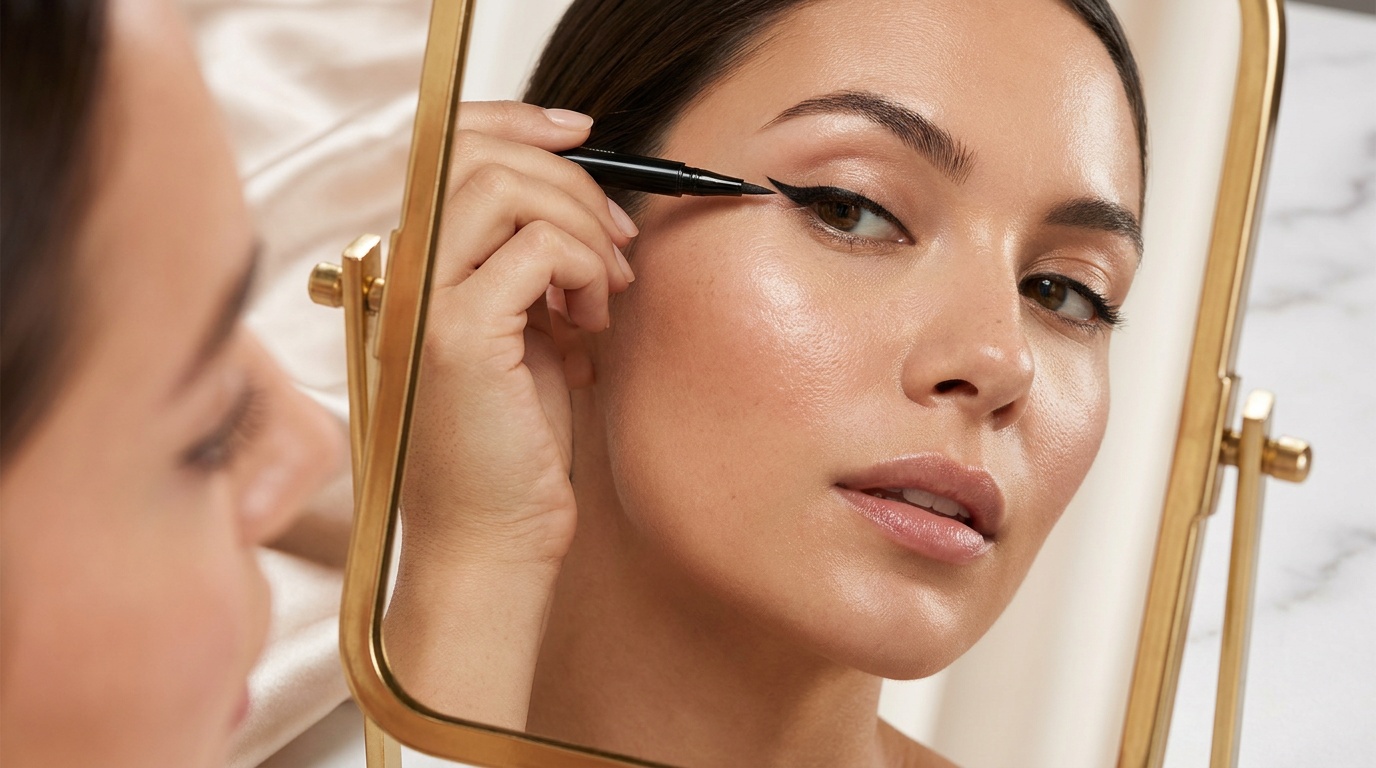
This is the easiest method I recommend for most eye shapes and skill levels. Don’t try to draw the whole thing in one motion. That’s usually where things go sideways.
- Look straight into a mirror with your chin slightly lifted.
- Find your wing angle by imagining your lower lash line extending upward toward the tail of your brow.
- Draw a short flick outward from the outer corner using that angle.
- From the tip of the flick, draw a line back toward the upper lash line, creating a small triangle.
- Fill in the triangle.
- Line your upper lash line from the center outward, connecting it to the wing.
- Add liner from the inner corner to the center using a very thin line.
- Step back and compare both eyes before making either wing bigger.
- Clean the edge with a cotton swab or a bit of concealer on an angled brush.
The big trick with how to do winged eyeliner is building shape gradually. Start tiny. You can always make the wing thicker or longer, but once it gets bulky, you’re basically negotiating with your entire eyelid.
Look, sisters, not twins. That old makeup saying is real. Your eyes may not be perfectly symmetrical, and your wings don’t need to be mathematically identical to look good.
What is the best winged eyeliner for beginners?
The best type depends on the finish you want and how steady your hand feels that day.
- Felt-tip eyeliner pen: Best for crisp lines and fast application. Great if you want a classic sharp wing.
- Gel eyeliner: Best for control and richer pigment. Good for medium to dramatic wings.
- Powder shadow with an angled brush: Best for a soft, smudged wing and for anyone who wants an easier learning curve.
If you’re brand new, I’d start with either a pen that has a flexible but not overly floppy tip, or a deep matte powder shadow. Powder doesn’t punish mistakes the same way liquid can. You can sketch the shape first, then trace over it if you want more intensity.
From an ingredient angle, I also like formulas without added fragrance near the eyes. If your eyes are sensitive, watch for excessive alcohol content too, since that can feel stingy on some people. Everyone’s tolerance is different, but gentle formulas usually make practice less annoying.
How do you make winged eyeliner even on both eyes?
This is probably the most common struggle when people search how to do winged eyeliner. The answer is to use reference points, not guesswork.
Try these practical tricks:
- Map both wings before lining the lash line: Draw the flick on each eye first so you can compare angles.
- Use your lower lash line as a guide: It gives you a more natural lift.
- Keep your eyes open while checking shape: A closed eye can hide where the wing will actually sit.
- Work in thin layers: Thickness changes symmetry fast.
- Correct downward wings early: If the flick drops too low, your eye can look dragged down.
I’ve found that it helps to do a tiny dot where you want each wing to end before drawing anything. That little marker keeps one side from suddenly becoming dramatic while the other is still just trying its best.
Also, avoid stretching your eyelid too much. It can make the line look smooth while you’re drawing, but once you let go, the shape may bounce back unevenly.
How to fix winged eyeliner mistakes fast
You do not have to wipe off your whole eye look because one wing got messy. Most mistakes are fixable in under a minute.
Here’s what to do:
- Dip a pointed cotton swab in micellar water and erase just the edge.
- Use concealer on a small angled brush to sharpen the bottom line of the wing.
- If one wing is slightly smaller, match it by extending it a tiny bit rather than thickening the whole liner.
- If the line skipped, go over the gap with short strokes instead of pressing harder.
- If your liner transferred, set the area around it lightly with powder or shadow.
Honestly, cleanup is part of the process. Even makeup artists clean edges. A crisp underside can make a pretty average wing look super intentional.
How to do winged eyeliner for different eye shapes
There isn’t one universal wing that flatters every eye the same way. The best technique depends on visible lid space, outer corner shape, and how your liner sits when your eyes are open.
- Hooded eyes: Keep the wing small and focus on seeing the shape with your eyes open. A very thick line can hide your lid space.
- Round eyes: Extend the wing outward more than upward for a slightly elongated effect.
- Almond eyes: Most wing styles work well. Keep the lash line thin for a classic shape.
- Downturned eyes: Angle the wing slightly upward from the outer third of the eye to lift the look.
- Monolid eyes: Use a wing that’s visible with eyes open and consider a slightly thicker outer line.
So, if one tutorial never seems to work on your face, that doesn’t mean you’re bad at eyeliner. It usually means the technique wasn’t made for your eye shape. Once you adjust the angle and thickness, things get easier, promise.
How do you make winged eyeliner last all day?
Smudging usually comes from oil, tears, rubbing, or using too much product at once. Long wear is mostly about layering lightly and letting formulas set.
For better staying power:
- Prep lids with primer or powder.
- Choose a long-wear pen, gel formula, or waterproof option if your eyes water.
- Let each layer dry before blinking hard or adding shadow.
- Set gel liner with a matching black or brown powder shadow.
- Avoid applying rich balm or cream too close to the outer corner.
I’ve found that setting the outer wing with a tiny bit of powder shadow helps a lot, especially in humid weather. It softens the chance of transfer without taking away that clean shape.
The Bottom Line
Learning how to do winged eyeliner gets much easier when you stop trying to nail it in one stroke. Prep your lids, map the angle from your lower lash line, keep the inner line thin, and build the wing slowly. A pen, gel liner, or even powder shadow can all work beautifully if the technique matches your eye shape and comfort level.
And yeah, a little cleanup is normal. That’s not cheating, that’s just makeup.
If you want more practical beauty tips, ingredient-conscious picks, and soft little savings on products you’ll actually use, sign up for Insider Beauty’s weekly deals.
Want more tips and exclusive beauty deals delivered to your inbox? Pop your email in the box below and join thousands of insiders who save big every week.