
The easiest way to contour for beginners is to use a cool-toned contour shade one to two shades deeper than your skin and place it only where shadows naturally fall: under cheekbones, sides of nose, jawline, and around the hairline. Then blend until you can’t see where it starts or ends. Here’s exactly how to contour step-by-step, plus the products and tricks that make it basically foolproof.
So if you’re nervous about looking muddy or streaky, you’re not alone. I’ve messed up more bronzer-contour combos than I’d like to admit, but once you understand placement, undertone, and blending, contouring suddenly becomes… weirdly easy.
Quick Takeaways: How To Contour For Beginners

- Start with a light base (tinted moisturizer or sheer foundation) so contour blends easily
- Choose a cool or neutral contour shade that’s 1–2 shades darker than your skin, not orange
- Place contour where you see natural shadows: under cheekbones, jawline, sides of nose, hairline
- Blend more than you think you need, using small circular motions and a clean brush or sponge
- Finish with a touch of blush and highlighter so your face looks sculpted but still soft and natural
What Is Contour And Why It Matters For Beginners
Contour is makeup that mimics natural shadows to subtly reshape your face. Unlike bronzer (which warms up your skin), contour adds depth so cheekbones look higher, noses look slimmer, and jawlines look a bit sharper.
For beginners, the biggest thing is this: contour should look like a soft shadow, not a stripe. When it’s done right, people won’t think “nice contour,” they’ll just think your bone structure looks really good.
Basic contour rules for beginners:
- Use contour to create depth (cool/neutral shade)
- Use bronzer to add warmth (slightly golden shade)
- Use highlighter to bring features forward (light, reflective)
Once you see contour as “fake shadows,” everything gets a lot less confusing.
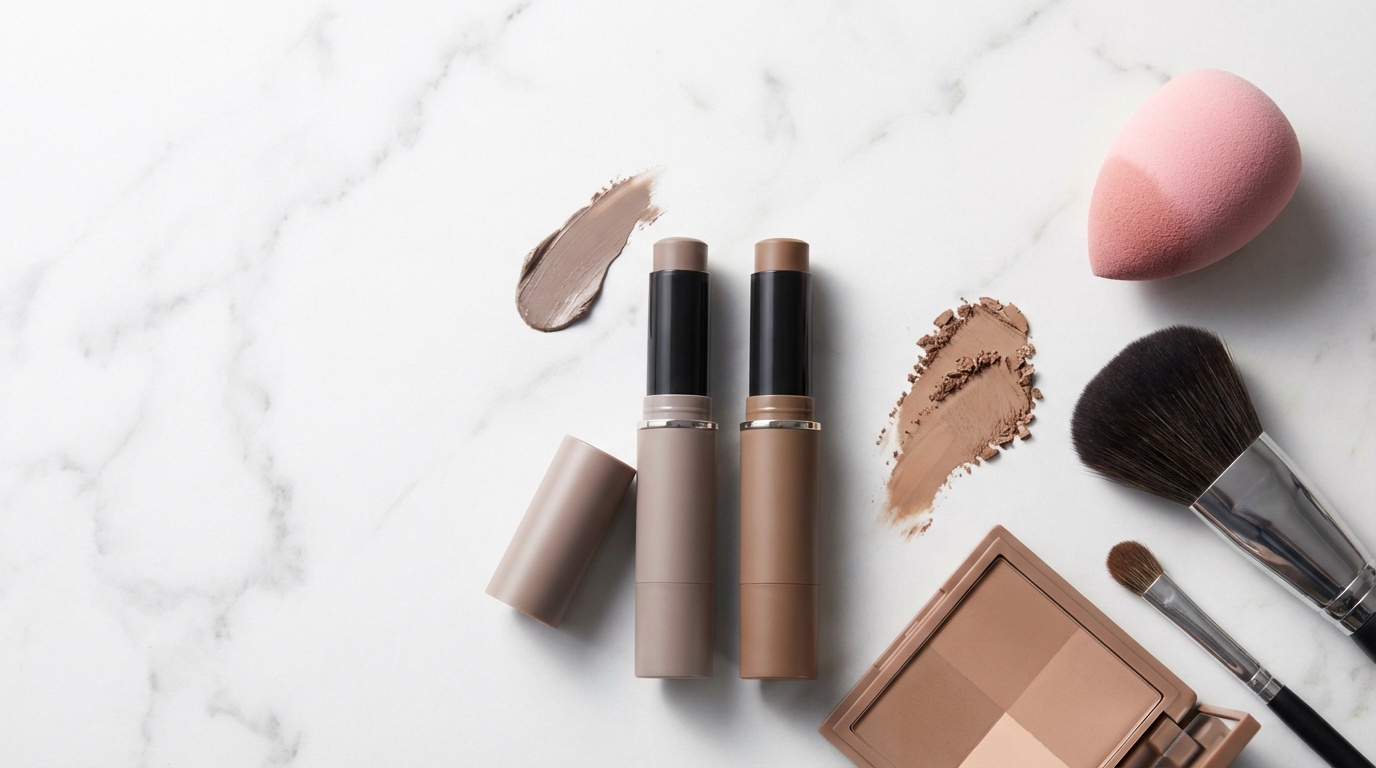
Best Products To Contour For Beginners
You don’t need a 6-pan palette to start contouring. Honestly, that’s how a lot of people overwhelm themselves. Keep it simple with one contour product and one blending tool.
1. Choose Your Formula: Cream vs Powder
- Great for: dry or normal skin, beginners who like a natural, skin-like finish
- Pros: blends easily, looks softer, forgiving if you over-apply
- How to use: apply a few small dots or short lines, then blend with a sponge or dense brush
- Great for: combo or oily skin, anyone already comfortable with powder bronzer
- Pros: easy to control, layers well over set foundation
- How to use: lightly dip an angled brush, tap off excess, and slowly build intensity
If you’re very new and scared of harsh lines, I usually recommend starting with cream contour sticks or a cream contour palette. They’re easier to sheer out.
2. Pick The Right Shade And Undertone
This is where most beginners go wrong.
- Fair to light skin: look for cool taupe or soft beige-brown (no orange, no red)
- Medium skin: go for neutral brown with a slight cool tone
- Tan to deep skin: choose rich neutral or slightly cool chocolate browns
A quick test: swipe the contour shade on your inner wrist.
- If it looks grayish-brown, that’s good for contour
- If it looks warm, golden, or orangey, that’s better as bronzer, not contour
You can absolutely use a matte, cool-toned powder foundation or matte eyeshadow a couple shades deeper than your skin as contour in a pinch. I do this all the time when I travel.
3. Helpful Tools For Blending
- Beauty sponge: gives the softest, most natural blend (slightly damp works best)
- Dense angled brush: good for placing and buffing contour under cheekbones and jaw
- Small fluffy eyeshadow brush: amazing for nose contour and eye socket contour
Start with one main face brush and one small eye brush. You don’t need a full brush wardrobe yet.
Step-By-Step: How To Contour For Beginners
Here’s a simple contour routine you can use daily. It works with both cream and powder.
- Prep Your Skin And Base
- Map Out Your Contour Points
- Apply Under The Cheekbones
- Softly Define The Jawline
- Warm Up The Hairline (Optional)
- Add Subtle Nose Contour (Optional)
- Blend Everything Seamlessly
- Set And Finish With Blush & Highlight
1. Prep Your Skin And Base
Contour goes on much smoother over hydrated, even skin.
- Cleanse and moisturize as usual
- If you’re oily, use a light mattifying primer on the T-zone
- Apply a light foundation, BB cream, or tinted moisturizer
- Conceal any spots or under-eyes
I’ve found that medium coverage or less works best when you’re learning how to contour for beginners. Heavy, matte bases can grab onto contour and make it patchy.
Let your base sit for a minute. If you’re using powder contour, lightly set your face with translucent powder so everything blends better.
2. Map Out Your Contour Points
Before you apply contour, it helps to know exactly where it should go. Think: where would natural shadows fall if a soft light hit your face from above?
The main contour areas:
- Under cheekbones
- Along the jawline
- Around the hairline/forehead
- Sides of the nose (optional)
An easy trick: stand near a window and tilt your head slightly down. You’ll literally see where your face naturally shadows. That’s where contour lives.
3. How To Contour Cheekbones For Beginners
This is the most flattering and most forgiving area to start.
- Find your cheekbone: use your fingers to feel where your cheekbone sits, then place contour just under it.
- Start near the ear: place the product at the top of your ear, moving toward the corner of your mouth.
- Stop halfway: only bring the contour about halfway in toward the center of your cheek. Don’t go all the way to your mouth—that’s where things start to look muddy.
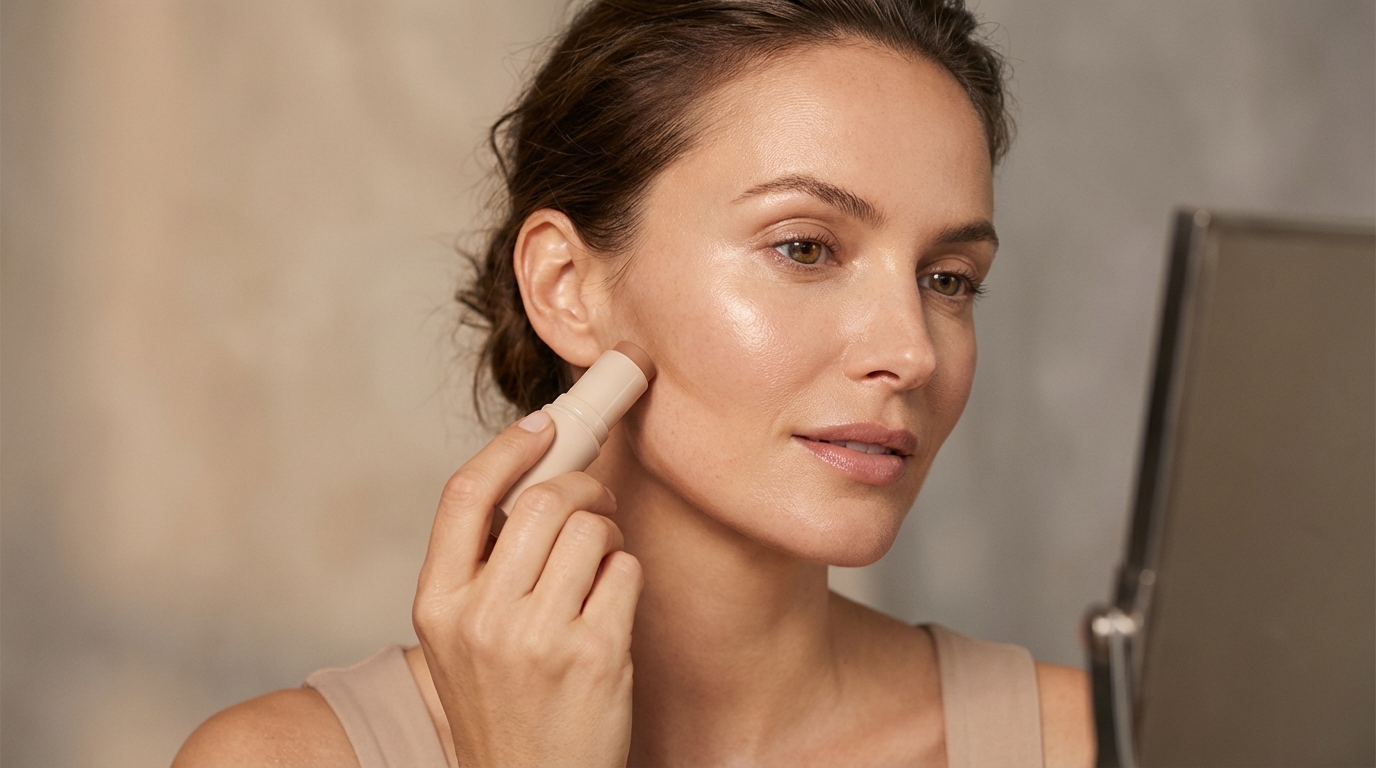
For cream contour: draw a short line or a few dots under each cheekbone.
For powder contour: tap your brush, then gently sweep in short strokes along that same line.
Blend upward, not downward. If you blend down, you drag your face down with it. Tiny circular motions or tapping with a sponge works best.
4. How To Contour Your Jawline Without Looking Fake
Jaw contour is subtle but makes a big difference on camera or in photos.
- Look straight ahead and slightly tilt your chin up.
- Apply a thin line of contour right under your jawbone, from ear to chin.
- Blend down onto the neck so there’s zero harsh line.
You’re not trying to draw a whole new jaw, just add a slight shadow where one naturally exists. If you can see a distinct brown line, keep blending.
Beginners tip: use less product on the jaw than on the cheeks. It’s easier to add more than to fix a muddy neck.
5. Forehead And Hairline Contour Basics
If you have a larger forehead or you just like a bit of warmth around the face, hairline contour looks really pretty.
- Focus on the outer edges of the forehead, near the temples and along the top of the forehead close to the hairline
- Use whatever’s left on your brush or sponge—not a fresh swipe of product
- Blend inward toward the center of your forehead in soft circular motions
If your forehead is already small, you can skip this or use a warm bronzer instead of contour just for a sun-kissed effect.
6. How To Contour Your Nose For Beginners
Nose contour is optional and honestly, it’s the easiest to overdo. For beginners, keep it super soft.
- Use a small fluffy eyeshadow brush and a tiny amount of contour powder.
- Start at the inner front of your brows and lightly sweep two soft lines down the sides of the nose.
- Connect them with a tiny curve under the tip if you want it to look a bit shorter.
- Blend with a clean brush or your fingertip until the lines look more like a shadow than stripes.
I like to tap a bit of translucent powder over nose contour at the end. It diffuses everything so it looks less “Instagram 2016” and more “maybe that’s just your nose.”
7. Blending Tricks So Your Contour Looks Natural

Blending is where contour goes from harsh to flawless.
- Use less product at first: a sheer wash is easier to fix than a dark streak
- Bounce, don’t drag: if you’re using a sponge, bounce it over the contour lines instead of swiping
- Blend edges only: keep most of the pigment where you placed it and soften just the borders
- Use a clean brush or sponge: going over everything once with a clean tool melts your contour into your foundation
If you accidentally go too strong, take a bit of your foundation or concealer on a brush and lightly tap over the area to tone it down.
8. Set Your Contour And Add Blush + Highlight
To lock everything in and make your contour look intentional, add a few finishing touches.
- Lightly dust translucent setting powder over areas that tend to crease or get oily
- Add a soft powder or cream blush to the apples of your cheeks, blending it slightly into your contour so there’s no harsh transition
- Tap a subtle highlighter or luminous concealer on the tops of cheekbones, bridge of the nose, and cupid’s bow
This contrast—shadow (contour), color (blush), and light (highlight)—is what makes your makeup look sculpted but still like skin.
Common Contour Mistakes Beginners Make (And How To Fix Them)
So, if your contour has ever looked muddy or weirdly obvious, you’re not alone. Here’s what usually went wrong—and how to fix it fast.
Using a shade that’s too warm
Switch to a cooler, more taupe-toned contour. Use your current product as bronzer instead.Drawing harsh lines and not blending enough
Apply less, then blend with a damp sponge or clean brush in small circles.Bringing contour too close to the mouth
Stop your cheek contour around the outer edge of your eye for a lifted look.Contouring with shimmery products
Stick to matte formulas for contour. Save shimmer for highlight.Putting contour all over the face
Focus on 2–3 key areas: cheekbones, jawline, maybe hairline. You don’t need every trend from TikTok at once.
Honestly, once you correct the shade and placement, 80% of contour problems disappear.
Beginner-Friendly Contour Routine You Can Try Today
Here’s a simple everyday routine using basic products most people already own:
- Apply a light layer of tinted moisturizer or foundation and blend well.
- Conceal under eyes and any redness, then lightly set with translucent powder if you’re using powder contour.
- Use a cream contour stick or matte powder that’s 1–2 shades darker than your skin.
- Contour under cheekbones (ear to mid-cheek), then jawline, then a tiny bit along the hairline.
- Blend everything upward and outward with a sponge or brush until no harsh lines remain.
- Add blush to the apples of your cheeks and blend into your contour.
- Tap on a bit of cream highlighter on cheekbones and the tip of your nose.
- Finish with mascara and a tinted lip balm if you want to keep it fresh.
The whole thing can take under 10 minutes once you’ve done it a couple times.
The Bottom Line
Learning how to contour for beginners really comes down to three things: the right shade, the right placement, and blending until you can’t see where it starts or ends. You don’t need a huge palette or pro skills—just a cool-toned contour, a decent brush or sponge, and a light hand.
Play with it on a low-stakes day (like a night in, or a quick coffee run) so you can tweak what works for your face shape. Take selfies in natural light and adjust from there. You’ll be surprised how quickly your hands “remember” where everything goes.
If you love beauty tips like this, you can sign up for Insider Beauty’s weekly deals to get editor-curated discounts, new product launches, and more how-tos straight in your inbox.
Want more tips and exclusive beauty deals delivered to your inbox? Pop your email in the box below and join thousands of insiders who save big every week.