
The best way to apply false lashes is to trim them to fit your eye, let the glue get tacky, then place them as close to your natural lash line as possible. This works because a custom fit and tacky adhesive keep the band comfortable, secure, and less visible. Here's exactly how to apply false lashes so they look natural, stay put, and don’t irritate your eyes.
Quick Takeaways
- How to apply false lashes: trim, shape, glue, place, then blend with mascara and liner
- Always measure and trim your strip lashes to fit your eye shape
- Let lash glue sit for 20–40 seconds so it gets tacky before applying
- Place the band on your skin, not your lashes, as close to the lash line as possible
- Clean and reuse your false lashes to reduce waste and save money
How To Apply False Lashes Step By Step

So, let’s walk through how to apply false lashes in a clear, no-drama way. This is the routine I use on myself and on friends who swear they’re “terrible at lashes.”
- Prep your natural lashes
- Measure and trim the false lashes
- Shape the lash band
- Apply a thin layer of lash glue
- Wait for the glue to get tacky
- Place the lash in the center, then secure corners
- Pinch natural and false lashes together
- Blend with liner and mascara (if needed)
1. Prep your natural lashes
Honestly, this step is the difference between lashes that stay put and lashes that pop off halfway through dinner.
- Gently clean your eyelids so there’s no oil or heavy cream on the lash line. A micellar water or gentle oil-free makeup remover works well.
- Curl your natural lashes with a lash curler.
- Apply one light coat of mascara to your natural lashes. Let it dry.
A bit of mascara gives the falsies something to “sit” on and helps them blend. If you prefer a softer, clean-beauty look, go for a tubing mascara or a formula with fewer synthetic fragrances.
2. Measure and trim the false lashes
The biggest mistake I see: people slap on a full strip straight from the box. Most strip lashes are too long for most eyes.
- Hold the false lash strip along your lash line without glue.
- Align the inner corner about 2–3 mm away from your tear duct (starting too close can poke and water your eyes).
- See where the outer end stops — if it goes past your natural lashes or droops downward, it’s too long.
- Trim from the outer edge, not the inner edge, using small scissors.
I’ve found that trimming them into a slightly shorter “half-lash” can look incredibly natural and is way easier if you’re a beginner.
3. Shape the lash band
Look, stiff bands are the enemy of a comfortable fit.
- Gently bend the lash band into a C-shape using your fingers.
- You can also wrap it around a makeup brush handle for a minute.
This helps the strip hug your eye shape instead of lifting at the corners. If you’re sensitive, choose thin, flexible bands and avoid heavy plastic lashes.
4. Apply a thin layer of lash glue
The type of lash adhesive matters a lot, especially if you have sensitive eyes or prefer cleaner formulas.
- Use a latex-free lash glue if you’re sensitive or want to avoid latex.
- Look for formaldehyde-free and fragrance-free on the label.
To apply:
- Squeeze a tiny bit of glue onto a clean surface or the back of your hand.
- Use the tip of the tube or a thin brush to apply a thin, even line along the lash band.
- Add a tiny extra dot on each outer corner, since that’s where lashes tend to lift.
You don’t need a thick goopy layer — more glue doesn’t mean stronger hold, it just means more mess.
5. Wait for the glue to get tacky
This step is where most people rush and then wonder why their lashes slide everywhere.
- Let the glue sit for about 20–40 seconds.
- You’ll see the glue change from wet/shiny to slightly duller and tacky.
Tacky glue grips right away instead of sliding around. I usually wave the lash gently in the air to speed things up (very glamorous, I know).
6. Place the lash in the center, then secure corners
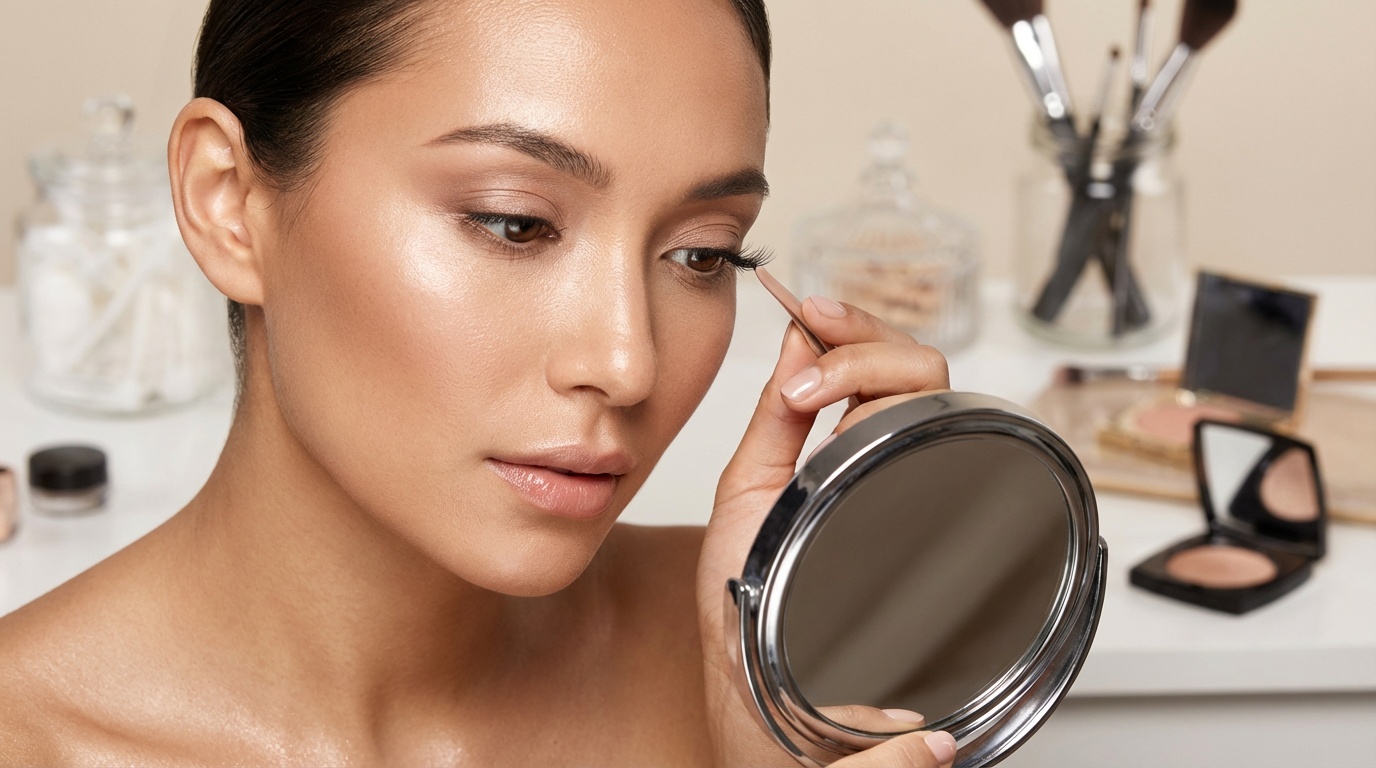
Here’s how to apply false lashes without poking your eye or gluing your lid shut:
- Look slightly down into a mirror (place it on a table, not straight in front of you). This flattens the lid.
- Using tweezers or a lash applicator, hold the strip in the middle.
- Place the center of the lash strip onto the center of your lash line, as close as you can get without sitting on top of your natural lashes.
- Then press down the outer corner.
- Finally, press down the inner corner.
I’ve found that working center → outer → inner gives you way more control than trying to land the whole strip in one go.
7. Pinch natural and false lashes together
To make your false lashes look natural, you need them to blend with your real ones.
- Use clean fingers or tweezers to gently pinch your natural lashes and the false lashes together along the band.
- Press along the band from inner to outer corner to make sure everything is sealed.
If you feel any sharp edges or poking, you may need to trim the band a bit more at the outer corner next time.
8. Blend with liner and mascara
This is where the magic happens.
- Use a soft eyeliner (pencil or gel) to trace along the top of the lash band, filling in any gaps.
- If you like a more dramatic look, add a small wing that connects to the band.
- Add a very light coat of mascara to blend your natural lashes with the falsies.
If you’re using wispy or delicate lashes, go easy on the mascara so you don’t weigh them down or shorten their lifespan.
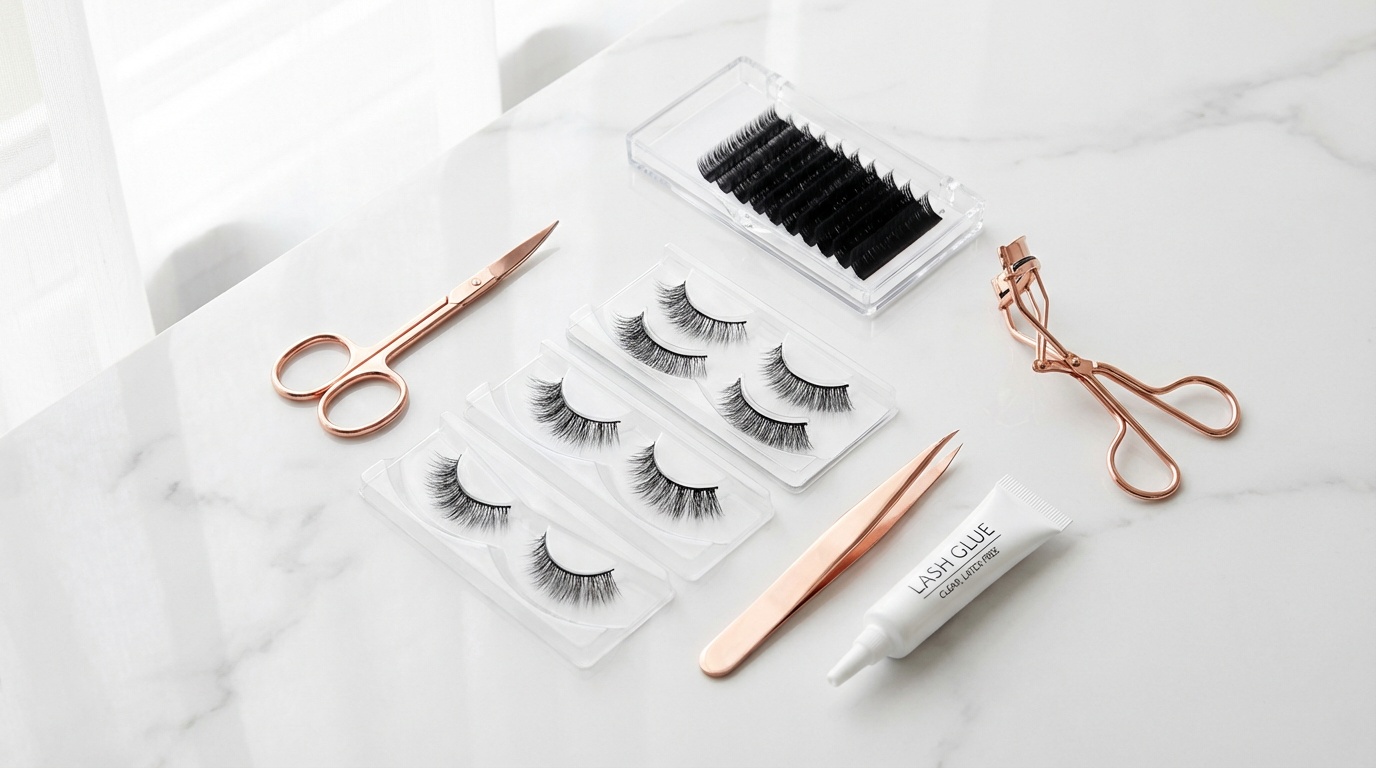
Best Types of False Lashes For Beginners
Choosing the right type of false lashes makes applying them so much easier. Here’s what I usually recommend to friends who are just starting.
- Strip lashes: A full band of lashes you apply in one go. Great for beginners once you get the hang of placement.
- Half or accent lashes: Shorter strips that sit on the outer half of your eye. Super flattering and easier to control.
- Individual or cluster lashes: Small groups of lashes you glue along your natural lash line. More customizable and can look very natural, but they take more time.
If you’re ingredient-conscious, look for:
- Synthetic fibers instead of mink (kinder to animals and often more consistent)
- Clear bands for a softer, more flexible feel
- Lightweight, wispy styles instead of super dense, heavy ones
I’ve found that a soft, criss-cross strip lash with a clear band is the sweet spot between natural and glam.
How To Apply Individual Lashes (Short Version)
If strip lashes feel like too much, individual or cluster lashes can look incredibly natural.
- Curl your lashes and apply a light coat of mascara.
- Use short, medium, and long clusters for a natural gradient (short in the inner, longer toward the outer corner).
- Apply a tiny bit of individual lash glue to the base of each cluster.
- Wait a few seconds for it to get tacky.
- Place each cluster slightly above your lash line, not on your waterline.
- Build up volume where you want it — usually more toward the outer corners.
Look, these take more patience, but once you get used to them, they’re great for a “your lashes but better” effect.
Clean Lash Glue: What To Look For (And Avoid)
Since lash glue sits right next to your eyes (and basically on your skin all day), ingredients matter.
When you’re shopping for lash adhesive, look for:
- Latex-free: Especially if you have allergies or sensitive skin
- Formaldehyde-free: Some older or cheaper glues can release formaldehyde as they cure
- Fragrance-free: Fragrance around the eye area can be irritating
- Clear or dark options: Clear is more forgiving; dark blends with eyeliner
Try to avoid:
- Strong chemical smells
- Glues that feel burning or sting on application
If you react to most conventional lash glues, patch test on your inner arm first. I know it’s an extra step, but your eyes will thank you.
Common False Lash Mistakes (And Easy Fixes)
Here’s how to apply false lashes without running into the most common issues.
Lashes lifting at the corners
Usually means: not enough glue or glue wasn’t tacky.
Fix: Add a tiny extra dot of glue to the corners and wait the full 20–40 seconds before placing.Band looks obvious or too thick
Usually means: heavy band or no liner.
Fix: Use a thinner band next time and always apply a bit of liner over the seam.Eyes feel tight or sore
Usually means: strip is too long or band is too stiff.
Fix: Trim more from the outer corner and opt for flexible, clear bands.Glue clumps and makes a mess
Usually means: too much product.
Fix: Apply a thinner line, scrape excess off the tube tip, and let it get tacky.Lashes look droopy
Usually means: strip extends past your natural lash line.
Fix: Trim the lash so it ends where your natural lashes end or slightly before.
How To Remove and Reuse False Lashes Safely

Knowing how to apply false lashes is only half the story — removing them gently keeps your natural lashes happy and lets you reuse your falsies.
- Soften the glue with a cotton pad soaked in oil-free remover or a gentle cleansing balm (keep it on the lid, not in your eyes).
- After 20–30 seconds, gently peel the strip from the outer corner inward.
- Use tweezers or fingers to pull off old glue from the band.
- If needed, lightly clean the lashes with a water-based cleanser on a cotton swab. Don’t soak them.
- Let them air dry, then store them in their original tray to keep their shape.
I regularly get 5–10 wears out of a good pair of strip lashes by cleaning them this way, which means less waste and less money spent.
The Bottom Line
The key to learning how to apply false lashes is taking your time with the basics: trimming to fit, using the right amount of glue, and letting it get tacky before you place the strip. Once you get that center-then-corners placement down and blend with a little liner, lashes start feeling a lot less scary and a lot more fun.
If you want more tips like this plus curated clean-beauty picks, you can sign up for Insider Beauty’s weekly deals — I share ingredient-conscious finds, lash-friendly mascaras, and the best budget-friendly lash tools I’ve tested myself.
Want more tips and exclusive beauty deals delivered to your inbox? Pop your email in the box below and join thousands of insiders who save big every week.